Showing posts with label Modifying patterns. Show all posts

Thursday, March 28, 2013

Introducing Beth Bunny


There have been lots of 'starts' in our household in the last few months, but precious few 'finishes', so I'm proud to have a 'nearly there' to show off today!  I've admired Alicia Paulson's Miss Maggie Rabbit pattern for a while now, and this week I not only managed to buy it, but make a version of it.  If you follow the link to the pattern you'll probably wonder whether in fact I followed it, so here's the rundown on why Beth is Beth and not Maggie:

The fabric:  The pattern calls for felt.  I didn't have any, and am determined to use up my stash.  What I did find was a small leftover piece of woven faux fur fabric.  Not only was it just enough to make Beth, but it is actually a scrap from when my Grandma made me 'Big Bun' when I was two (I'll take a photo when the young one wakes up, but safe to say I've always been very unimaginative in naming things!).  

The construction:  Felt doesn't fray, but my fabric will, so instead of exposed hand-stitching, I used a moderately wide zig-zag and a short stitch length on the machine to construct most of Beth.  To facilitate this I cut the ears about 4mm larger all round than the pattern shows, to allow for turning (I also ended up with nearly 1cm of seam allowance at the base of the ears this way).  I stitched along the edge of the fabric, so for the other pieces I figured that my seam allowance was about the same as Alicia used.

I decided that I wanted Beth's ears to stand up, so before I stuffed her head I pinned the seam allowance at the bottom of the ears to the side of her head from the outside.  I removed the pins after her head was firmly stuffed, and her ears definitely stand up!  Pinning the seam allowances to the top of her head would have given her floppy ears instead.

One drawback of my fabric choice was that I had difficulty seeing what I was sewing when it came to hand-sewing on Beth's arms and legs.  I went round each a couple of times just in case - I don't want to be fixing severed limbs later!
 
The colours:  I used a paler nose and whiskers for Beth, given her white fur, but I wish now that I'd made the whiskers the same colour as her nose.

The dress:  The dress is a cut-down of a peasant top that the young one wore when she was 3 months old.  It already had the smocking on the front, elastic on the sleeves, the ruffle on the bottom and a button tab down the back.  I used Alicia's pattern as a guide for the sizing of the pieces (although my sleeves are shorter and the dress is longer by the depth of the ruffle).  

The finishing touches:  I do have some red felt in the stash, and have cut out some little boots to finish her off.  All being well this'll happen before Sunday, so that Beth can be carefully placed for the young one to find on Sunday when her brothers are hunting Easter eggs.

Happy Easter!

Monday, August 27, 2012

Love the A-line

Have you checked out Nicole Mallalieu's A-line skirt pattern yet?  I've had a hankering for a new skirt, 'just' the fabric in my stash, and amazingly no A-line skirt pattern in my collection.  I bought Nicole's pattern, and am so glad I did.  I made this skirt yesterday while the Cyclist and the boys were in Bendigo for the day, and was waxing lyrical about it by the time they got home.

The pattern comes together really well, fits fantastically (she includes an instruction of how to modify the pattern if your waist is a size larger than your hips), and definitely doesn't look home made.  Its also very adaptable.  I've cut out a second version which I'll show off as soon as I've got it finished to show you what I mean.

Here's the details of my 'butterfly skirt':

Pattern:  Nicole Mallalieu's A-line skirt
Size:      12 

Modifications:  

  • Trimmed the yoke by 1" at the waist to make this measurement equivalent to a size 16. 
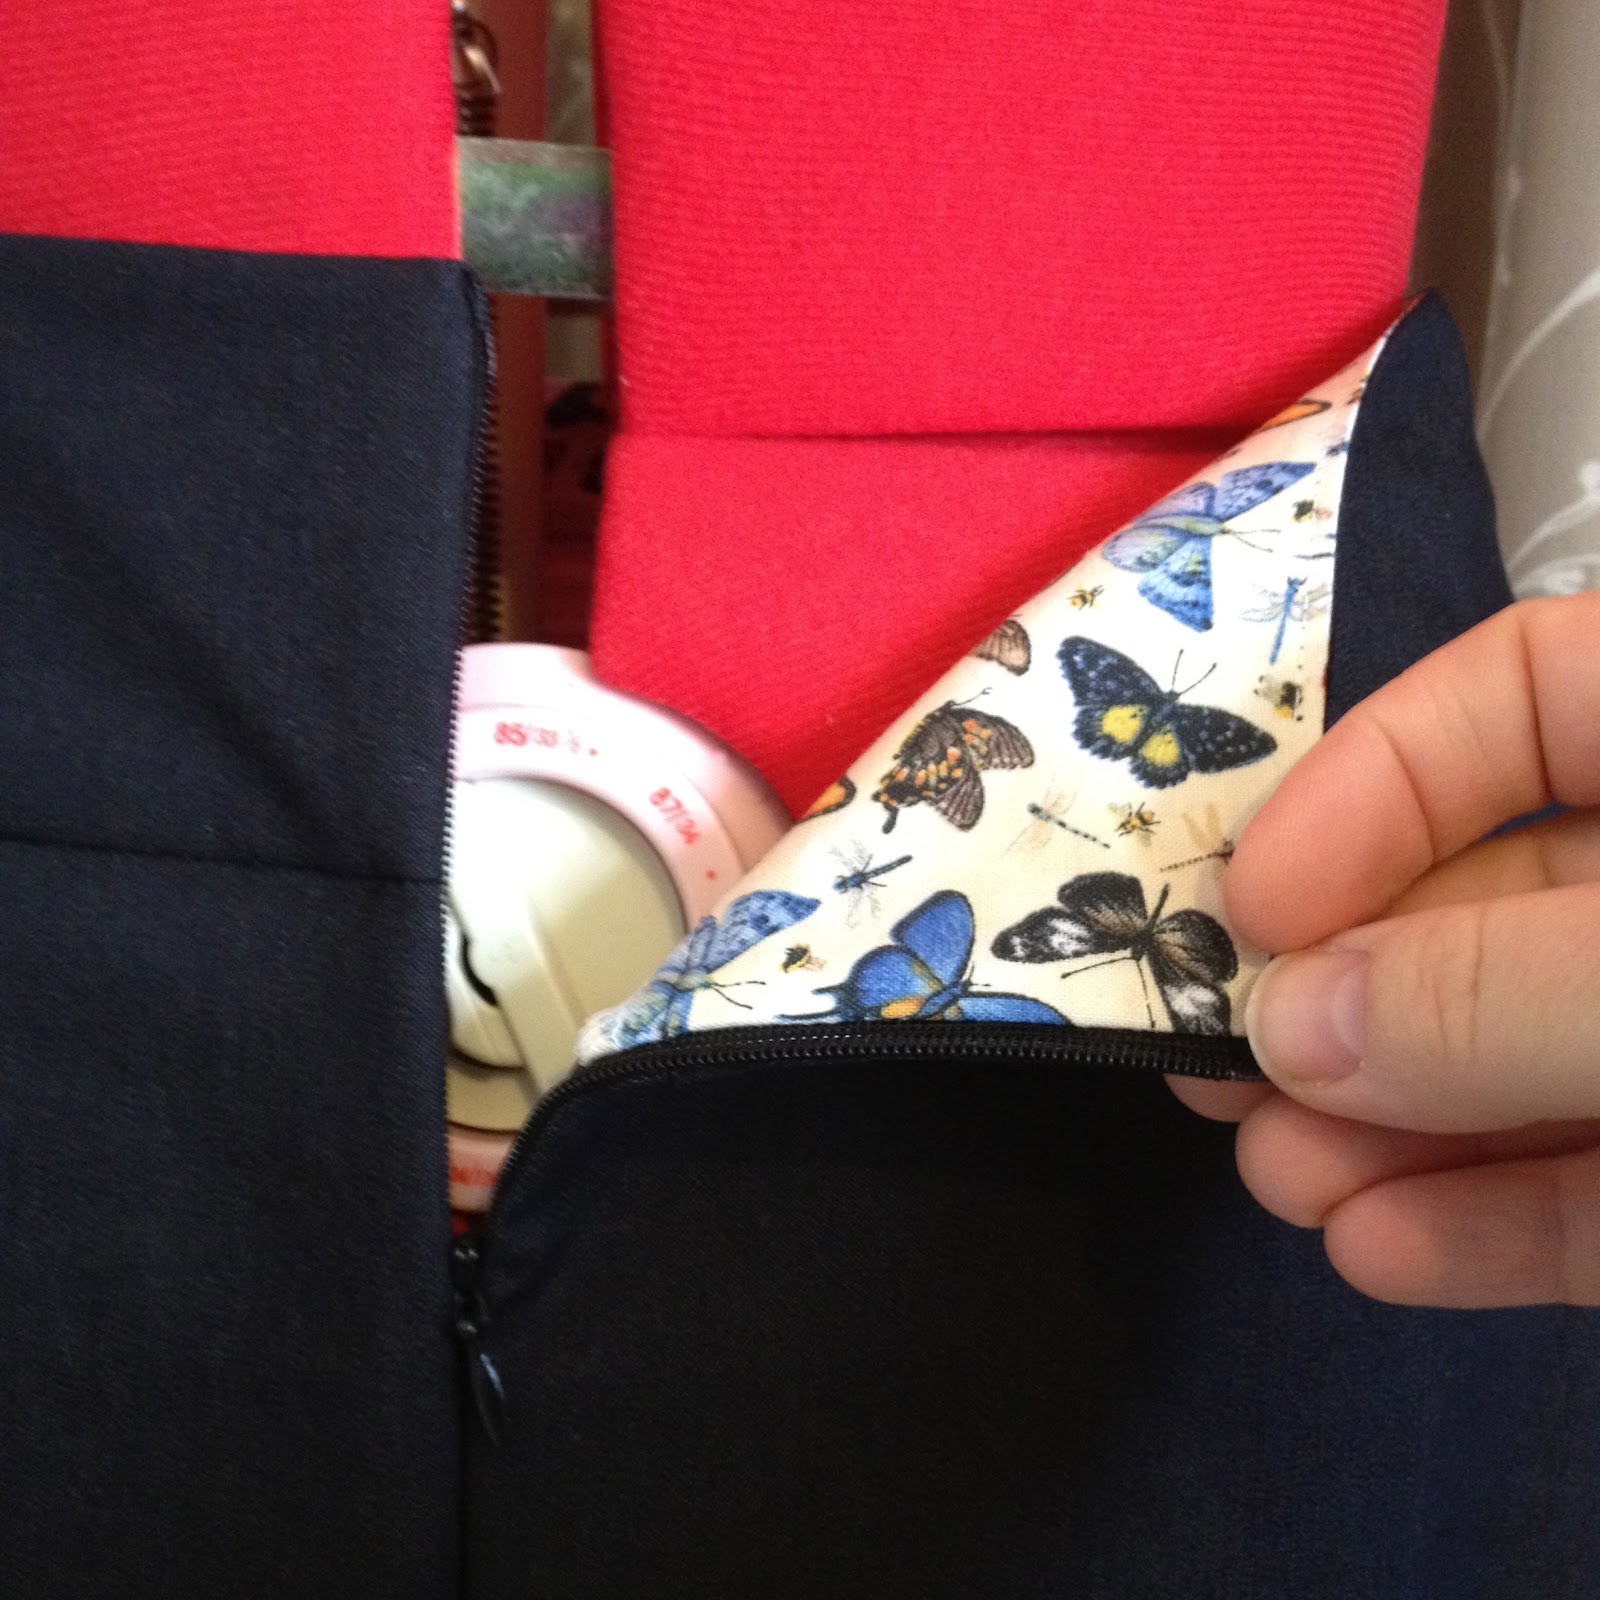
  • Added a panel of butterfly print fabric (underlined with a white poly-cotton) to the right side of the front.  Nicole suggests that for denim you can applique the panel over the top of the base fabric.  I found that the combined weight of the print and the poly-cotton was similar to the denim, so I pieced the front instead.
  • Added a side pocket on the right side.

Butterflies in my pocket!
Materials:  
Black stretch denim and a remnant of  'Illuminating Spring' (by Stephanie Marrot for Wilmington Prints) from the stash

Lessons/Comments:  

  • Nicole's directions really are fantastic.  They gave me the nudge I need to try blind hemming for the first time.  I also used the same foot to help me edge stitch and stitch in the ditch more accurately.
  • My feature panel's 1/4 of the width of the front piece, which's probably a little on the small side.  
  • This was my second attempt at putting in an invisible zipper, and the first time with my new invisible zip foot.  Her instructions are really good, and I was thrilled with the results yesterday.  Looking at the photos, my job's not perfect, but I suspect that no one else will notice.

  • I love this skirt so much that today I was tempted to tuck my top in to show it off, something that hasn't happened for a long time (probably since the waist grew to be two sizes larger than the hips!)
More butterflies on the inside


Tuesday, February 7, 2012

'Spring cleaning'

I'm doing a progressive spring clean of our house.  It started with the boys toys, and was originally born out of necessity, as there was no way that the birthday and Christmas presents could fit in the house otherwise.  I'm now picking off shelves/drawers at a time, and this week I tackled some of my clothes.  I'm trying to balance between what'll [hopefully] fit in 6-12 months time, what really should be binned, and what could be re-configured / should be given away.  Yesterday afternoon I tackled my sleepwear drawer, and turned a tank top I've never been that keen on into another pair of pants for the Newbie.  I used Rae's pattern again, with some adjustments...


Pattern:  Rae’s Basic Baby pant


Materials:  
A tank top of mine

Modifications:  
One of my goals for the next year or so is to begin to see patterns as a starting point - to look beyond the illustrations provided and make each garment 'my own', rather than simply sewing them as drawn.  These pants are a simple way to start!  They're also a starting point for getting a bit more comfortable with knits, which's another of my goals.

As with the previous pair of pants, I used the bottom hem of my top as the hem of the pants, doing away with the need to hem them separately, and added the length of the hem (ie. I lazily lined up the bottom of the pattern piece with the bottom of the T-shirt).  

Ribbon
I used some ribbon we'd been given around a present for the Newbie to decorate the bottom of the pants, tying a bow at the side of each leg, and sewing it down before sewing the inside leg seam.  I also used a little on the pocket, and the rest for the waist drawstring.

Waist
I took a bit of inspiration from the Kinderboy's bathers for the waist of the pants, switching the elastic for a drawstring.  I created a break in the centre front seam from a point around 2.5cm from the top to around 4cm from the top of the pants (see blury photo below):

I then stitched around the full waist casing, without leaving a gap for the insertion of elastic.  When I'd finished I threaded a ribbon/elastic combination through the waist via the opening I'd created, tying it at the centre front.  I used around 30cm of ribbon on each end of a 35cm long piece of elastic.  This gives the flexibility of an elastic waist, but will also effectively allow me to let out the waist of the pants as she grows.  I stitched through the pants and the elastic at the centre back to stop the drawstring being pulled all the way through the pants (the ribbon/elastic combo is also longer than the waist of the pants, so that the ends of the ribbon won't get lost inside the casing either).

Pocket
I used an offcut to create a pocket for the back of the pants.  No science to it I'm afraid, I just noticed that some of the offcuts looked a bit 'pocket-shaped', trimmed one, gathered top and bottom, then stitched it on (the top of the pocket is the bottom of my original top, meaning that no hemming was required).


Thursday, February 24, 2011

And then there were sleeves...

... well one anyway.


This week in my creative space I need to sew in the 2nd one, attach the bottom band and ruffle and tidy up a couple of things (if I say it fast it'll only take 5 minutes to do, right?), and then my spotty dress will be finished!  I'm pushing hard to get it done because the Man and I have a date on Sunday (Tim Minchin vs. the MSO) and I think that such a special occasion / rare occurrence is the perfect time to wear the dress for the first time.

What are you up to today?  Have you been over to Kirsty's yet?

The how and why of the sleeves:

I decided that the spotty dress (here and here) needed sleeves.  My arms need covering from time to time for vanity and more frequently for the weird Melbourne summer we're having.  I thought I'd document my approach just in case you'd like to try it:


I chose a shirt with a sleeve that included gathering.  This suits the style of the dress, but I also figured that it would be more forgiving of the fact that I was going to put it into a bodice other than the one it was designed for.  I used a shirt pattern with a similar fit to the dress.  I used the sleeve from View A of this pattern as my starting point.

** A note about notches **
Most likely the notches on your sleeve pattern and the ones on the bodice won't line up.  This doesn't matter, and you can ignore them as far as that goes.  What's important is that they show you which is the front of the sleeve and which is the back - check out the bodice of the pattern you're lifting them off to see whether the single or double notches are the back.  This is important because sleeves aren't quite symmetrical - there's a little more room on the side which joins the back to allow for arm movement.  I recommend cutting the notches in the back to help you be sure that they are against the back of your bodice.  On my pattern the double notches are on to the back.


 I traced the pattern, cut it out of calico, then pinned it into my trial top.  It was too long.  I had already decided that the best way to make the sleeves blend with the rest of the dress would be to finish them with a band of the spotty fabric with a red ruffle poking out the top of it.  I trimmed the calico sleeve so that the bottom of the sleeve would line up with the bottom of the top section of the bodice.


I then re-gathered the bottom of the sleeve, and pinned it into the actual dress.  I decided to steal 5mm from the seam allowance of the sleeve in doing so - it just seemed to fit better into the dress.  Once I'd done this I realised that I had trimmed too much off the bottom of the sleeve, and need to add about 2cm back (my seam allowances have been 1cm on the dress so far).  I also felt that there was too much fullness in the bottom of the sleeve.


I pulled the sleeve back out and reduced the fullness by changing the angle of the underarm seam.  I then re-fitted the sleeve (inside out - hence the fact that it's mysteriously changed sides).  I also reduced the width of the gathering along the top - I thought it made the gathering look more deliberate and less like ease gone wrong.  Once I'd tried it on I adjusted the width of the gathers at the bottom so that I was happy with the look and feel of it.


Removed the sleeve again, measuring the final width of the bottom with the gathers in before removing the gathering thread.  I also marked the new positions for the gathering across the top to start and finish.
Transferred the sleeve pattern back onto tissue paper (I wouldn't have worried, but I wanted to be sure that I remembered to add the 2cm back onto the bottom).

I had worked out that the gathered band for the bottom of the dress starts out being twice times the width of the dress.  The finished width of the base of my sleeve is 34cm.  This means I need bands which finish up being about 3cm wide by 34cm around from the spotty fabric, and red gathered fabric which starts out being 70cm long (including seam allowance), for each sleeve.  I made a pattern for each, then cut out and assembled as per the rest of the dress.

A longer process than I would usually be bothered with (particularly when you add the trial top into the mix), but I'm glad I made the effort, and maybe it'll give me more courage to personalise things in the future.

LinkWithin

Related Posts Plugin for WordPress, Blogger...