Showing posts with label Stash busting. Show all posts

Wednesday, February 26, 2014

A little bit of Yardage


A week or so back Nic from Yardage Design had a samples and seconds sale.  I filled up my cart, and emptied it again.  Surely I don't need any more fabric, and things are tight on the money front.

In the end I justified settled for a tea towel and a fat quarter.  The fat quarter's Verano Leaves in crimson.  I love both this design and her Verano petals (I still haven't found anywhere to use these cupboards in the new house though, so they're languishing in the garage).  I thought the fabric'd make a great 'handbag' for the young one.  She's very girly, and a bag of some sort is well overdue.

Well, the fabric arrived a few days ago, and I decided that I needed the Verano Leaves for myself.  Operating on the theory that its linen and therefore should be suited to the task, I've made it into a second tea towel (I'm fantasising about the new kitchen it'd look great in).


Fortuitously, Nic sent the fabric through in a calico bag which, with the young one's approval, became a handbag this morning.  I added some extra calico, and some firm iron-on interfacing so that its reasonably stiff, as well as fully lined.  A zipper, webbing, and the obligatory red cotton fabric, from the stash make it complete.  I'm really pleased with the outcome, and glad to say that she's also very happy with it.


PS.  I am assuming that the print on the bag wasn't heat set, but didn't think to iron it before I washed it, so it has faded a little in patches.  This isn't reflective of Nic's fabric or other items, which I've never had that issue with.

PPS.  This post is in no way sponsored, although you'd be forgiven for thinking so!

Friday, February 14, 2014

Library love

I love browsing the magazines at my local library.  I have to confess that I rarely make it to the 'real' shelves - I get quick snatches of time whilst supervising kids or on my way out to lunch (I'm lucky enough to work next door to my local library), so the magazine section it is.


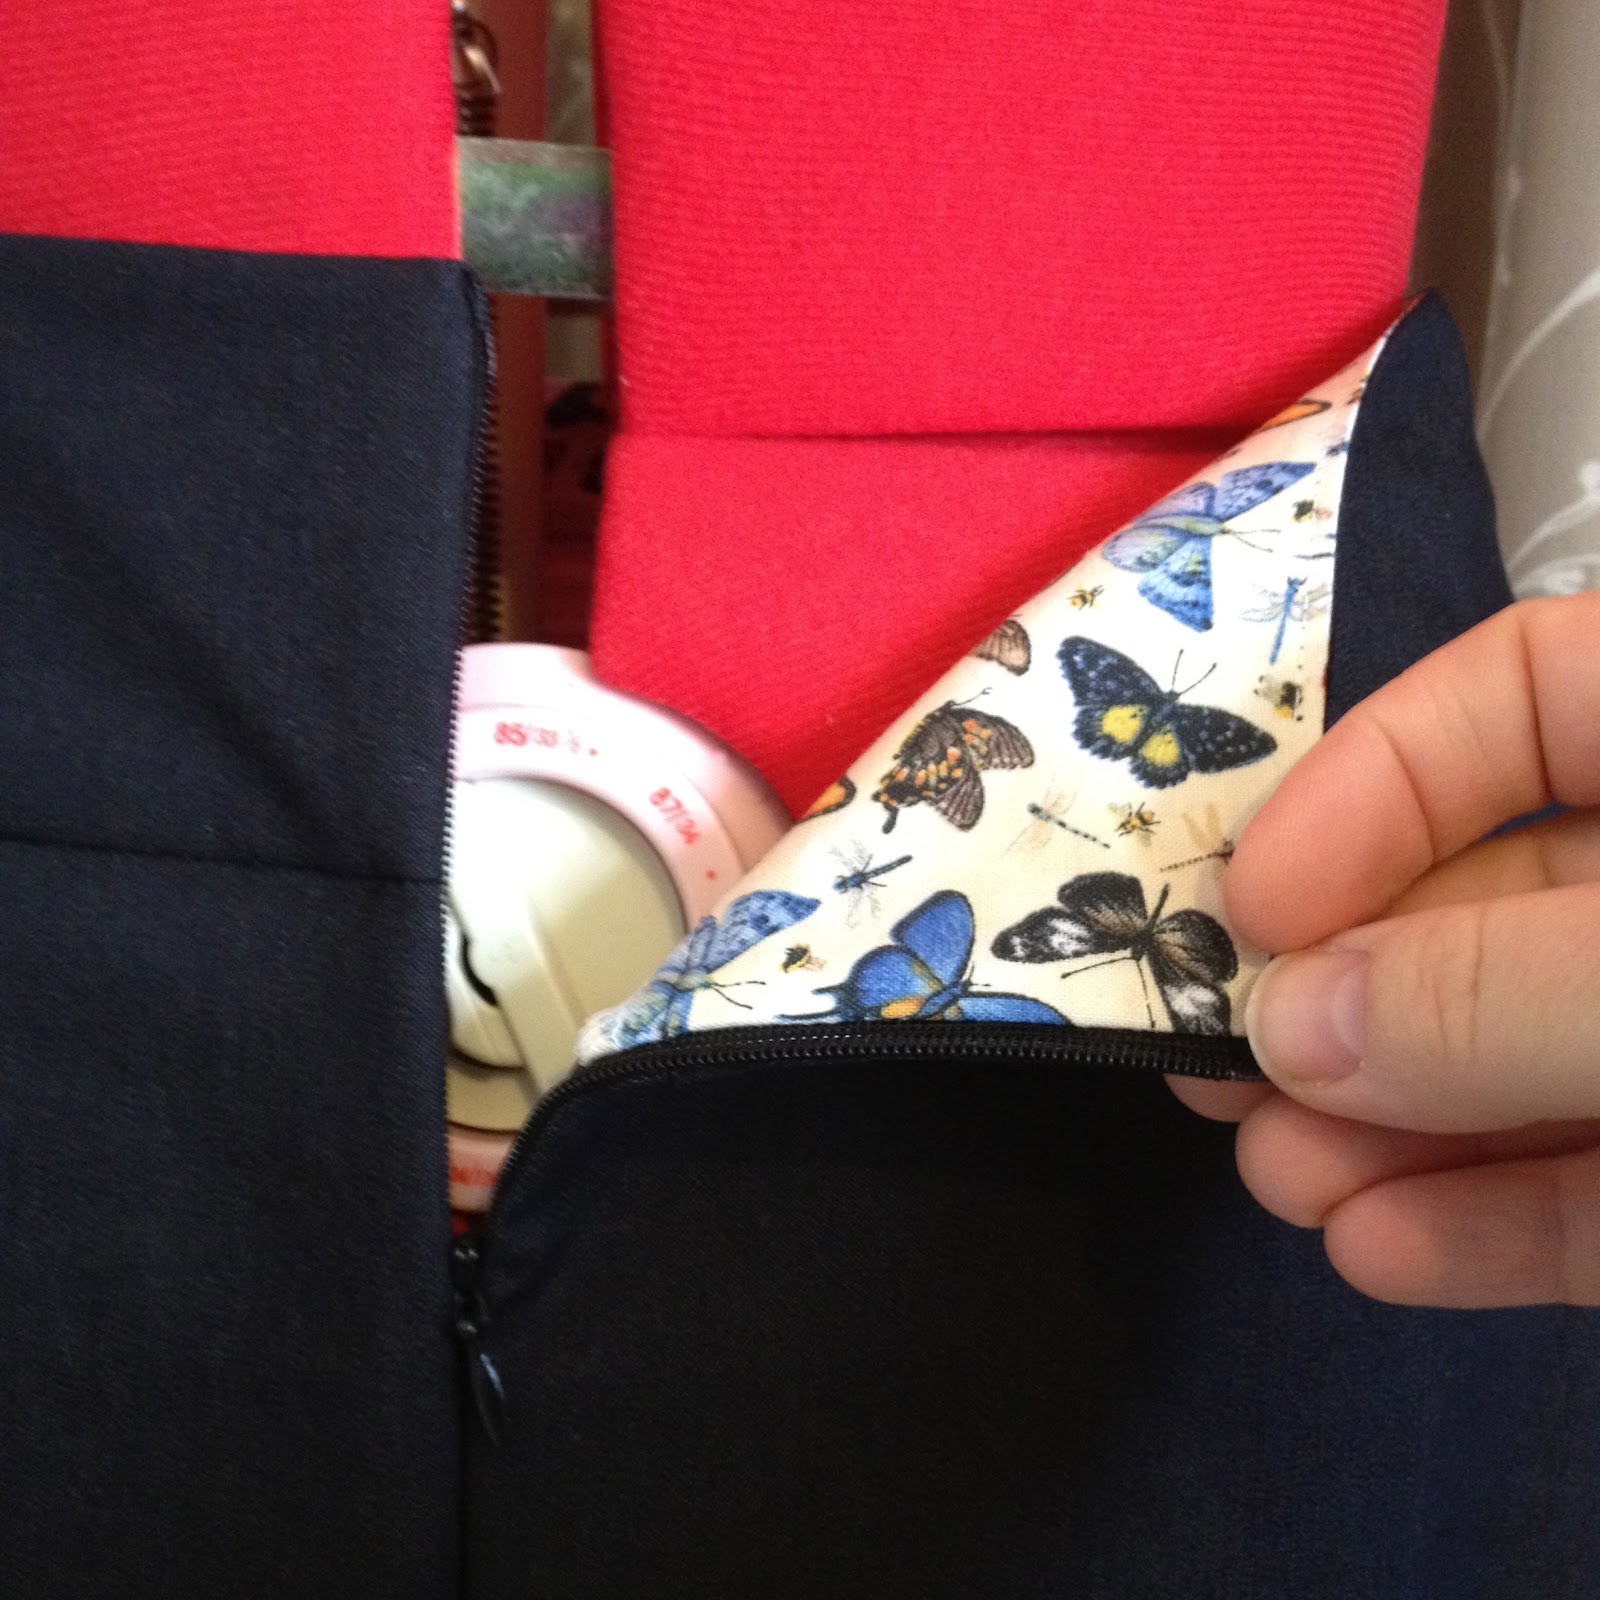
The Burda magazine pigeon hole is one of my first points of call.  So often I borrow them with good intention of tracing off patterns I like, but usually they get renewed the maximum of three times before being sent back unused.  I'm proud to say that that's not the case for the 6/2013 edition.  Granted, I've already renewed it once, but no only have I traced off the patterns for Views 137 and 138, but I've actually finished a top based on them.  What's even more impressive is that I love it!  So often I take copious amounts of time to finish clothes for myself, only to find that they're not quite right - the fit's not great, or my fabric choice is wrong, or the cut isn't really my style.  This time though, the dark navy crepe from my stash is not only right down my alley, but it has just the right weight and drape for the pattern.

I've used the length from View 137, but the neckline of View 138.  Its a size 46, which I find horrific, but the fit is beautiful.  There are darts in the front and back of the upper section, but just the back of the lower section, and a side zipper that extends to the integrated sleeves.  Beautifully comfortable, but fitted at the same time.

Up next I'm planning a shorter length A-line skirt in the rest of the same fabric, plus the dress length (with a slightly narrower neckline) in a some more fabric from the stash.  I'd love a pair of narrow-leg trousers to go with the top.  Trying not to get too far ahead of myself though!

Its a curriculum day today, so amongst adjudicating between the kids and doing stuff with them, I'm going to loiter over here and check out what the crew have been up to.


Thursday, March 28, 2013

Introducing Beth Bunny


There have been lots of 'starts' in our household in the last few months, but precious few 'finishes', so I'm proud to have a 'nearly there' to show off today!  I've admired Alicia Paulson's Miss Maggie Rabbit pattern for a while now, and this week I not only managed to buy it, but make a version of it.  If you follow the link to the pattern you'll probably wonder whether in fact I followed it, so here's the rundown on why Beth is Beth and not Maggie:

The fabric:  The pattern calls for felt.  I didn't have any, and am determined to use up my stash.  What I did find was a small leftover piece of woven faux fur fabric.  Not only was it just enough to make Beth, but it is actually a scrap from when my Grandma made me 'Big Bun' when I was two (I'll take a photo when the young one wakes up, but safe to say I've always been very unimaginative in naming things!).  

The construction:  Felt doesn't fray, but my fabric will, so instead of exposed hand-stitching, I used a moderately wide zig-zag and a short stitch length on the machine to construct most of Beth.  To facilitate this I cut the ears about 4mm larger all round than the pattern shows, to allow for turning (I also ended up with nearly 1cm of seam allowance at the base of the ears this way).  I stitched along the edge of the fabric, so for the other pieces I figured that my seam allowance was about the same as Alicia used.

I decided that I wanted Beth's ears to stand up, so before I stuffed her head I pinned the seam allowance at the bottom of the ears to the side of her head from the outside.  I removed the pins after her head was firmly stuffed, and her ears definitely stand up!  Pinning the seam allowances to the top of her head would have given her floppy ears instead.

One drawback of my fabric choice was that I had difficulty seeing what I was sewing when it came to hand-sewing on Beth's arms and legs.  I went round each a couple of times just in case - I don't want to be fixing severed limbs later!
 
The colours:  I used a paler nose and whiskers for Beth, given her white fur, but I wish now that I'd made the whiskers the same colour as her nose.

The dress:  The dress is a cut-down of a peasant top that the young one wore when she was 3 months old.  It already had the smocking on the front, elastic on the sleeves, the ruffle on the bottom and a button tab down the back.  I used Alicia's pattern as a guide for the sizing of the pieces (although my sleeves are shorter and the dress is longer by the depth of the ruffle).  

The finishing touches:  I do have some red felt in the stash, and have cut out some little boots to finish her off.  All being well this'll happen before Sunday, so that Beth can be carefully placed for the young one to find on Sunday when her brothers are hunting Easter eggs.

Happy Easter!

Wednesday, November 14, 2012

In miniature

I'm still going on my 'clothing baby' projects (I have some more clothes nearly ready to show you), and I haven't forgotten my promise to make the Kinderboy a shirt, but in a side project I've made baby a little bear of her own.


This little bear measures just under 12cm in height, and I have to admit that I came across it accident.  Some time ago I knitted all the parts to it, but stopped at that.  It has been buried in my scrap wool pile ever since.  I'm not sure who the original recipient was intended to be (although I suspect that it was the Schoolboy), but as every baby needs a teddy I've finished him and handed him over to Cate for safe-keeping.

Thursday, November 8, 2012

Clothing baby

My little one is into dolls.  She's not even one yet, but fell in love with this little Berenguer baby at the op shop a month or so ago.  I bought her with the intention of washing her up, dressing her, and then presenting her as a first birthday gift in December.  The only problem is, that she's been floating in and out of boxes and bags as I try and work on clothing, and each time the Newbie smothers her in kisses and I feel mean packing her away again.  Its very cute, but I'm determined to stick to my guns and clothe little 'Cate' before handing her over.

I'm working on some knitting as well as sewing projects, but this is the first one that I've finished:


It's from the 'Nakey Baby' project over at The Blueberry Moon.

Modifications:  
I used a woven fabric, and found that I needed some added width to make it go over my baby's arms.  I increased the width of the sleeves by 5.5cm, and if/when I do it again I'll also widen the body sections a little for ease of dressing.

I increased the length of the pattern slightly, to match the scrap that I was using.  It turned out to be equivalent to the depth of the top and bottom hems.

Lessons/Comments:  
The bodice sections would make the good basis for a 'pillowcase' type dress.

For reference, my baby is around 13" long.

I'm linking up over here, so I'll see you there once I've actually done some paid work for the morning!

Monday, October 15, 2012

KCWC: Leila & Ben's Sweet Dress #2

Hmmm.  Kids clothing week was supposed to be about the boys.  Can't really see either of them wearing this little dress:

The youngest, however, is rather taken with it, and Melbourne may even warm up enough for me to put her into short sleeves sometime in the next day or so.  KCWC is officially over, but I'm going to keep going at it (half-paced as I am, my counter is currently up to 3:41:07.9), and boys shirts are next on my list.  I promise boys.

Here's the details for the spotty dress:

Pattern:  Leila & Ben's Sweet Little Dress 
Size:      12 months

Modifications:  
As with the previous version, I used my overlocker for all of the seams.  I also straightened the hem, because a curved bottom just looked strange with all those dots.

I'm thinking of adding a little embellishment on one of the dots, but more of that later (I still need to be convinced that she won't eat what I have in mind!)

Materials:  
Poly-cotton from my stash, left over from these dresses.

Lessons/Comments:  
I learnt from my mistake last time round, and tried it on her before cutting and stitching the elastic.

Wednesday, October 10, 2012

KCWC: Leila & Ben's Sweet Dress

Afternoon!  My KCWC counter is up to 1:55:37.0, which means that I 'steal' more sewing time during the day than I had realised.  Perhaps I should keep the timer up, to make sure my "I'll just be 5 minutes boys" sewing sessions don't routinely turn out to be 25 minutes like this morning's one.  Anyway, enough of the guilt trip, here's what I have to show:


Here's the details:

Pattern:  Leila & Ben's Sweet Little Dress 
Size:      12 months

Modifications:  
I was inspired by this dress, and gathered the neckline and sleeves onto a knit band rather than using elastic in a casing.  I cut the bands the same length as the elastic specified in the pattern, and made them 4cm wide.  The top is also shorter than the pattern (more tunic rather than dress length), based on the length of the brown top I started with.


Materials:  
All from the 'For repair or remodelling' box in my cupboard!  The front and back are from an old top of mine, but as the sleeves on it were too narrow I used fabric from another top for the sleeves, and part of a third for the band (my original top also had blue sleeves and a white band around the neckline).

Lessons/Comments:  
Peasant dresses/tops are super quick and easy (I nearly doubled the time involved by using the neck and sleeve bands), and I'll definitely be making more.  


I finished this dress before trying it on the young one, and found that the neckline was way too big for her.  So my dilemma now is - do I pull the neckband off and make it smaller, or wait until next year for her to wear it (this neck and armholes are similar to some size 2 tops I have).  I love it as it is, so I think I'll put it away for now, but the lesson is definitely to try things as you go if you're going to modify patterns (and also be suspicious and check if a pattern tells you to cut the same length of elastic for a 1 year old's dress as a 5 year old's!).

Wednesday, September 19, 2012

Butterfly specimen art

I have a piece of artwork underway for the girl's room.  It's way too complicated, and as a consequence is going no where fast.  I feel sad for her that the only things hanging on her wall are a group of five blank canvases (for the aforementioned artwork) and a clock.  So, rather than actually make progress on the first project, I've completed a quick fix in the last couple of days:


I'm the first to acknowledge that this is certainly not an original idea.  In fact, it wasn't an original idea when I made something similar for my niece about 5 years ago.  But I love it just the same.  It is also simple, and I thought I'd share my process with you, just in case you're inspired to do something similar.

Materials:
Butterfly print fabric
Iron on interfacing
Thick card for the background

Process:
I started out with some offcuts of the  'Illuminating Spring' (by Stephanie Marrot for Wilmington Prints)  butterfly fabric I used in this skirt (I have more left over, so they'll make another appearance at some point).  I then ironed some non-woven iron-on interfacing on the back.  I'd suggest using the stiffest that you have.  As my fabric was an odd size, I used a sheet of baking paper over it to stop the excess interfacing sticking to the iron or the ironing board.


I then cut out full butterflies (there were some on the fabric with their wings folded, and I didn't use these), and by sheer luck my offcuts yielded 37 butterflies.  I needed 36 for my project.  I used nail scissors for the cutting, as they allowed the precision I needed.  I wasn't too fussed if there was a small amount of background fabric left around each, and I also elected to cut off the antennae.


I then placed the butterflies in an arrangement that I was happy with, with the aim being to distribute the coloured ones throughout the frames.  The hard bit then was to work out what the spacing should be and how to line them up on the background.


Somewhere around about here I cut my thick card into squares the right size to fit inside my frames.  You need something with enough strength to take the weight of your butterflies without sagging over time.

I decided that I wanted to top of the wings to line up, rather than the bodies, and found that my quilting ruler was the best help for this.  Just be careful to learn from my mistake, and account for the width of any matt when placing the butterflies - I had to remove these three and start again, as I was too close to the top of my backing board!  Also, I found it easier to work upside down and to start with the bottom row, that way my ruler wasn't sitting on butterflies I'd already glued in place.


Now, fold your first butterfly in half, right sides together, so that your fold is along the body.  Then apply hot glue to the wrong side of the body (ie. the outside of the fold).  Press on to your background cardboard in the desired location, trying to keep the butterfly as folded as possible, but also making sure that the glue isn't attaching the two wings to each other.  You'll need to work pretty fast, as the glue cools and sets quite quickly.


Repeat for the rest of your butterflies.


When the glue has cooled and set you can squeeze the wings together a bit more if you like.  You can also pull off any glue threads that may be floating around.


Now you can frame them.  I used frames with double mounts, and the butterflies sat up from the backing cardboard enough to make a shadow, but the glass did flatten them more than I expected.  You could use a box frame if you wanted a more pronounced fold in the butterflies.

PS.  See that red butterfly in the middle?  It was really annoying me, as I attached it too low and the one below it too high.  I used a scalpel and carefully cut them off the background, then re-glued them in place.  Whilst you need to work quickly with the glue, mistakes can be rectified!

PPS.  My butterfly fabric has a cream background, but the fabric that I used for my niece had a black background, and the butterflies looked quite different from the fabric itself once they were cut out and mounted on off-white card.  Look at the colour of the butterflies, rather than the colour of the fabric when you're choosing a fabric for this project.

PPS.  There are more butterfly art & craft ideas in my 'artwork I could try myself' Pinterest board...

Oh, and the Girl is more than happy to have something to look at on her walls at last:


Wednesday, September 12, 2012

A-line #2 (Playing Fabric Chicken)

I'm not sure if its evident in what I make or not, but I usually wear solid colours.  I'm not really into patterns or text on clothing.  Not sure why.  It surprised me then, that last year I was attracted enough to some large floral fabric to order it from the States with no particular end-product in mind.  I wear a lot of red and black, and also white, and with the days getting warmer over the last few weeks, I decided to break out and turn it into another A-line skirt.  There was only a yard (90cm) of the fabric, and the pattern calls for 2m, so figuring out how to cut it out and the length of the finished product took at least as long as the actual construction process.  Here's my finished product:


The pockets are both for practicality, and also allowed me to overlap the pieces more on the fabric, meaning that I could keep this length without adding a contrast bottom at the hem.  They're from the Aztec skirt in the Autumn/Winter 2012 Ottobre Design magazine.

To save fabric I also needed to ignore the direction of the print!  The back it cut upside down, and as you can see I haven't made any attempt to match the pattern.  I also cut separate 5.5cm wide hem facings for the bottom (cut at 90 degrees to the rest of the skirt) to maximise the length of the finished product.


Here's the complete details:

Pattern:  Nicole Mallalieu's A-line skirt
Size:      12 

Modifications:  
  • I shortened the pattern by 23cm, and cut separate hem facings.  This allowed me to make a skirt that is around 20cm shorter than the pattern from my miniscule amount of fabric. 
  • As with the Butterfly Skirt, I trimmed the yoke by 1" at the waist.
  • I cut the waistband from a contrast fabric (again, saving my floral fabric).  I'm not sure if I like the look of it or not, but the reality is that most of the time my top will hide it, as you can see in this dodgy self-taken shot.
  • I added pockets, using white for the underpocket piece, so that the red wouldn't show through the floral fabric:
I used a 5mm seam, and then under-sewed the allowance to the white fabric.

I then attached the red pocket piece to this (pinning across the top and the pocket opening and then sewing all round the outside of the pocket):

From there I treated the whole as if it were a single bit of material, and made up the skirt as usual.

Materials:  
90cm of 'Artful Home' quilting cotton by Heather Mulder Peterson; and
'Jester' red cotton from the stash, but originally from Spotlight (I think I should have bought a bolt of this, I love the colour so much)

Lessons/Comments:  
  • I didn't use the blind hemming foot to stitch in the ditch this time, and wished that I had.  I also hand-hemmed it, and found that I would have been just as happy with the finished product if I had machine hemmed it like last time.
  • Making this skirt reminded me of this post over at Made by Rae.  She lists the length of material she buys if she doesn't have a project in mind.  Also, LiEr gives a good rule of thumb over here.

Monday, August 27, 2012

Love the A-line

Have you checked out Nicole Mallalieu's A-line skirt pattern yet?  I've had a hankering for a new skirt, 'just' the fabric in my stash, and amazingly no A-line skirt pattern in my collection.  I bought Nicole's pattern, and am so glad I did.  I made this skirt yesterday while the Cyclist and the boys were in Bendigo for the day, and was waxing lyrical about it by the time they got home.

The pattern comes together really well, fits fantastically (she includes an instruction of how to modify the pattern if your waist is a size larger than your hips), and definitely doesn't look home made.  Its also very adaptable.  I've cut out a second version which I'll show off as soon as I've got it finished to show you what I mean.

Here's the details of my 'butterfly skirt':

Pattern:  Nicole Mallalieu's A-line skirt
Size:      12 

Modifications:  

  • Trimmed the yoke by 1" at the waist to make this measurement equivalent to a size 16. 
  • Added a panel of butterfly print fabric (underlined with a white poly-cotton) to the right side of the front.  Nicole suggests that for denim you can applique the panel over the top of the base fabric.  I found that the combined weight of the print and the poly-cotton was similar to the denim, so I pieced the front instead.
  • Added a side pocket on the right side.

Butterflies in my pocket!
Materials:  
Black stretch denim and a remnant of  'Illuminating Spring' (by Stephanie Marrot for Wilmington Prints) from the stash

Lessons/Comments:  

  • Nicole's directions really are fantastic.  They gave me the nudge I need to try blind hemming for the first time.  I also used the same foot to help me edge stitch and stitch in the ditch more accurately.
  • My feature panel's 1/4 of the width of the front piece, which's probably a little on the small side.  
  • This was my second attempt at putting in an invisible zipper, and the first time with my new invisible zip foot.  Her instructions are really good, and I was thrilled with the results yesterday.  Looking at the photos, my job's not perfect, but I suspect that no one else will notice.

  • I love this skirt so much that today I was tempted to tuck my top in to show it off, something that hasn't happened for a long time (probably since the waist grew to be two sizes larger than the hips!)
More butterflies on the inside


Tuesday, July 31, 2012

A hybrid top

As I mentioned in my last post, I loved the way the Topkids 63/3 top came together, but felt that sleeves were in order.

I'd love to learn to draft patterns, but the idea of drafting a sleeve pattern is just way too daunting (or perhaps, just a little time consuming) for me at this point in time.  I pulled out the trusty Simplicity 4243, and found to my surprise that in fact the two tops have a very similar cut.  I overlaid the two pattern pieces to redraft the sleeve shape of my Topkids pattern, and was then able to use the Simplicity View E sleeve.  I also shortened the pattern by 14cm whilst I was at it.  All in all it was a pretty simple process once I remembered that the Simplicity pattern uses a mixture of seam allowances.  Not at all like my previous experience of trying to merge two patterns together for myself!


I'm really happy with the result, and am already planning another from my stash.  I think I'll round the back neckline this time too (I might just use the back pattern piece from the Simplicity pattern).


Saturday, July 28, 2012

Pillowcase Dress #3: Topkids 63, Design 3

Here's the first of my 'Pillowcases 6 Ways' dresses for the upcoming spring and summer:


I finished it today, on what has to be one of Melbourne's most wintery days in what feels like the coldest and wettest winter for a long time, so there won't be any modelled shots for some time!

The pattern is from a Topkids magazine.  I discovered these magazines at my local library a few years ago, and subsequently bought some used ones on e-bay.  They've been out of print for some time (from what I can ascertain most of mine date from the late 1990s), and whilst some of the designs are a bit dated, plenty of them have appeal.

I found in using the first dress that the blue pattern on the pillowcases fades as it is washed (great if you've embroidered over it, but not so good if you're relying on it for decoration), so this time I used part of the patterned section of the pillowcase and selectively embroidered it using a simple backstitch.  I'm banking on the blue you can see fading within 2-3 washes.


The ric-rac is unforgivingly narrow, and comes from the stash I inherited from my Grandmother.  There's loads more of it, so hopefully I'll become more skilled in sewing it on accurately with practice.  The buttons were from the op shop, giving the dress a total purchase price of 30 cents!


The pattern came together quite well, however I have noticed that I already have several sleeveless tops/dresses for A for this spring/summer, so I'm thinking of making another version with sleeves.  I think I'll also make it tunic length, to make it easier for her to crawl in when the time comes.

The background and my 'rules' for the Pillowcases 6 Ways challenge can be found here, and my previous creations are here and here.

Thursday, June 21, 2012

Cosy toes

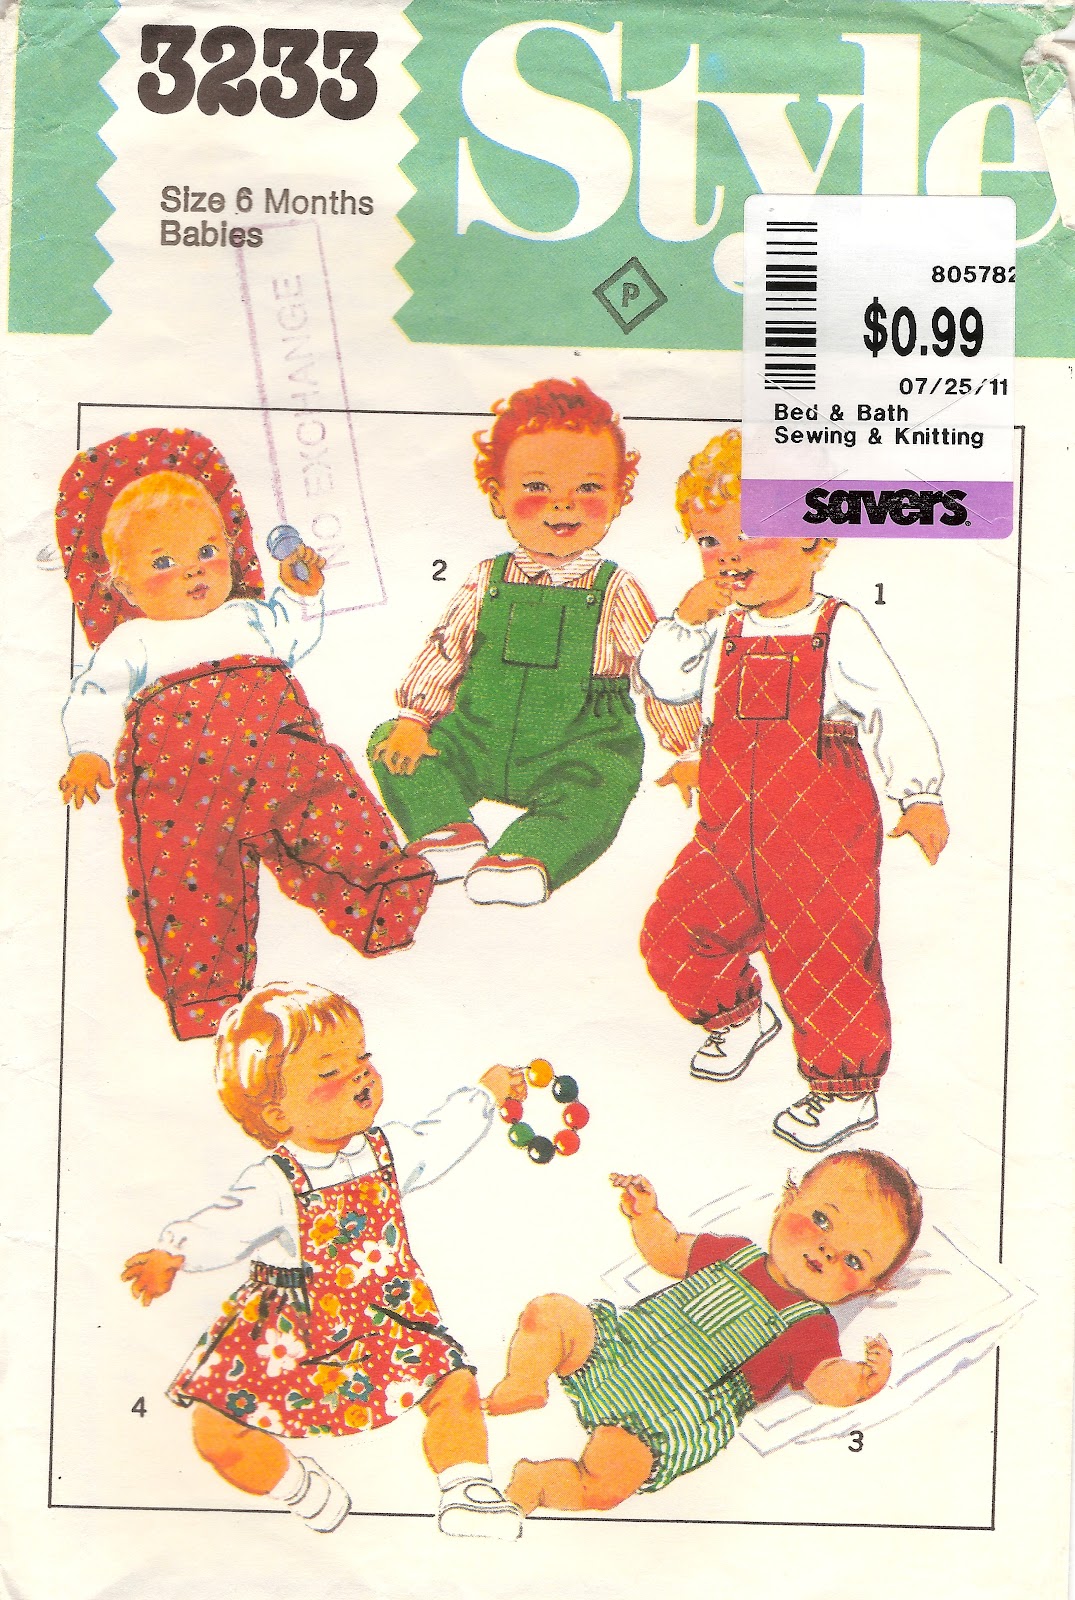
I bought a number of patterns from Savers last winter.  My pattern drawer's overflowing (well, actually its a drawer and a box now), and I was determined to only buy the patterns if I was going to use them.  I failed on the others - they were all maternity patterns, and have made it to the op shop without me so much as checking that all the pieces were there.  This pattern's my chance to redeem myself.  It's for six month old babies, and as the Newbie is now six months (and in need of a new on-line moniker), its now or never!


I bought the pattern for the 'cosy toes' view (top left).  From where I stand it looks fantastic - no more lost socks/booties on the way to school, no more blankets falling off the bottom of the stroller when out for walks, etc.  I pulled it out on the weekend, and found two bonuses:
  • The fact that its an old single-size pattern meant I could use it as-is:  no tracing off the size I was after.  This is one of my least-favourite things about sewing, as it seems like such a long process to go through before getting down to the 'real thing' of cutting and sewing the fabric.
  • The cosy toes pattern isn't actually designed for a six month old, its a 'one size fits all' through to 18 months.  Brilliant.  I've tricked myself into using the pattern, but I'll get to use the product this winter and next.  
I finished it at lunchtime, and from the first trial I guess she's as excited as I am!

I've made it with some polka-dot cotton I bought from Darn Cheap Fabrics a couple of weeks ago, lined with offcuts of bamboo quilt wadding and some solid pink and a tiny bit of floral that's been in my stash for an embarrassingly long time.  I did a butterfly applique on the back, mainly to hold the layers together (the seams do the job elsewhere).  Not being one to reinvent the wheel, the butterfly came from this download.  Now I just need it to stop raining so we can go for a walk and try it out.


Tuesday, April 24, 2012

Chuffed.

Our high chair has seen use for our kids as well as their cousins.  It's looking a little worse for wear, and the gigantic gash down the seat cover means that food spills aren't as easily wiped up as the manufacturer intended.  Somehow, this seems more important to me with a little girl in the house than it did with boys.  I'm not sure why, but I'm a bit more precious with the Newbie.  Maybe its a girl thing, maybe that she's always going to be the youngest, or maybe its that when the boys were young I didn't spend any time looking at craft projects on the internet!  Whatever the reason, I decided that before I started her on solids I was going to make a couple of washable covers for the high chair (no matter how washable the original cover is, its a pill to wipe right into the corners, and something I can throw in the machine would be far more practical).  Here's the first:


I'm rather chuffed.  The fabric came from my stash, as did the navy ribbing I used as binding, curtain lining as backing and leftover quilt wadding as padding.  I'm hoping that the curtain lining will be at least moisture resistant.  The plan is to make another the same, and reduce my fabric stash at the same time as extending the useful life of the high chair.  I've left the original cover underneath as its more padded than mine, but used it to make a pattern for the new cover, which just sits on top.  Sorry.  Will stop gushing now.

Sunday, April 1, 2012

Knitted baby cloche

I have to confess to spending way too much time gazing at Pinterest.  A while ago I pinned this lovely hat:

Source: pickles.no via Jackie on Pinterest


You can download the pattern for the hat and matching cardigan from the link (the 3-6 month size is free, and you can pay for 1yo and 2yo sizes).  I was a bit confused about the stated tension when compared with the size of the hat and the number of stitches, and wanted to knit it on straight needles using 8 ply (DK yarn if you're in the US), so I modified it accordingly.

Here's my version, which should fit a 3-6 month old (its a bit roomy on my 3.5 month old Newbie's largish head).  I used less than one ball from my stash of leftovers - I think it might be Patons Alpaca Classique from the late 1980s:


Using 4mm needles, cast on 89 stitches

Knit 7 rows, then Purl 1 row (this forms the basic stripe pattern, I've separated the pattern below into this grouping to make it easier to read)

Knit 7 rows
Purl 1 row

Knit 5 rows
Knit 45 stitches, then wrap your wool around the knitting between the needles about 10 times.  You should wrap it firmly enough to gather up the knitting you've already done (see photographs of finished hat).  Knit to the end of the row.
Knit 1 row
Purl 1 row

Knit 7 rows
P5, *P2tog, P5, repeat from * to end of row (77 sts)

Knit 7 rows
P4, *P2tog, P4, repeat from * to last stitch, P1 (65 sts)

Knit 4 rows
K3, *K2tog, K3, repeat from * to last two stitches, K2tog (52 sts)
Knit 2 rows
Purl 1 row

K2, *K2tog, K2, repeat from * to last two stitches, K2tog (39 sts)
Knit 3 rows
K1, *K2 tog, repeat from * to end (20 sts)
Knit 2 rows
Purl 1 row

K2 rows
*K2tog, repeat from * to end,  (10 sts)
Knit 1 row
*K2tog, repeat from * to end,  (5 sts)
Fasten off

Sew up centre back seam.

Thursday, February 2, 2012

Simplicity 4243 revisited

In the interests of getting the most out of my patterns, I've been making another Simplicity 4243 top.  Hopefully the colour is sufficiently different from the previous version that no one will notice that the Newbie's wearing the same thing over and over!


I did a few things differently, this time, so here's the rundown:

Pattern:  Simplicity 4243, View D with the sleeves from View A / B


Materials:  
40cm of an unknown print I received in a scrap pack recently (sorry, can't find it on the Fabricworm website, and the selvedge was no help)
A teensy bit of pink poly-cotton from the stash
Miraculously similar bias binding from the stash

Modifications:  
  • I didn't have enough pink for the sleeves, so I shortened them by about 1.5cm (ie. I made them as long as my fabric would let me) and then bound them with the floral material rather than hemming the sleeve as described in the pattern.
  • I bound the bottom with bias binding, rather than hemming it, meaning that the finished length is slightly longer than the pattern.
  • I made my own facing patterns for the neckline and cut these from the pink fabric, rather than using a bias strip.  This also allowed me to use a single button with elastic closure on the back (sorry for the blurry photos).  This's the first time I've used this sort of enclosure, and I love it already!

Lessons/Comments:  
I was about 2" short on the bias binding, and decided that I would sew it on anyway and do something different at the centre back.  My 'something different' ended up being to bind it with a leftover piece of the sleeve material.  Not the creative approach I had in mind I have to say.  Its on the back, and no one will ever see it (or the mis-matched pattern at the centre back seam), but it annoys me that it looks tacked on.  I could have joined my strip to the bias binding and made it look a whole lot better if I had thought more before sewing.  Of course, I could also unstitch it and re-do it, but we all know that's unlikely!


LinkWithin

Related Posts Plugin for WordPress, Blogger...