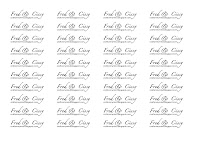
Anyway, I decided that I'd label some of my craft stuff, so I've made labels tonight honouring them. I hope that if you receive anything with a Fred & Cissy label it'll give you a smile to match Fred's in that photo!
If you want to make similar labels here's what I did:

- I made the labels in Word. I experimented with Word Art, and obviously you could use pictures if you like, but in the end I just used text in a table (no gridlines) - it was a lot less fiddly than trying to align multiple pictures/frames into neat rows. I got 5 columns and 10 rows onto the page in landscape format using this method:
- The tricky bit is that you need to 'mirror image' / horizontally 'flip' the text and any image. On the Mac I saved the Word document as a PDF, opened that in 'Preview', saved it as a JPEG, and then flipped that horizontally (for some reason it'll flip a photo but not a PDF). I've had a look at our PC, and the most straight-forward way that I can find so far to flip the text is to make sure that it's inserted in Word as Word Art. You can then click on the 'draw' tab and then 'flip horizontal' on the drawing toolbar. I tried inserting it in an auto shape, but the shape mirrors and the text stays the same. The other option would be to create your label in Paint, flip it there, then insert it multiple times as a picture in Word. Both options are not particularly user friendly in my opinion, so if you come up with a better way let me know!
- I printed a sample and checked it in the mirror just to be sure, then printed it onto some iron-on transfer paper from Lincraft (it comes in a pack of 5x A4 sheets).
- Cut the labels, leaving as little blank paper around them as possible (I used a guillotine to cut them into strips, and then cut them into separate labels from there, so that I could put space between them on the tape - if you were less stingy with your use of the paper (eg. had 3 or 4 columns instead of 5, then you wouldn't need separate them out).
- Iron them onto cotton tape following the instructions on the paper packet.

What a delightful story! And a very appropriate name for your labels. As an aside, how did you make the labels?
ReplyDeleteLovely story and thanks for sharing how you make your labels.
ReplyDelete