Friday, December 31, 2010

Repair work


A few years ago I salvaged some deck chairs from various roadside pickup piles.  Some were perfectly OK and some needed a bit of repair.  I fixed and stained them, then made new matching covers, using the cover of one that was OK as a pattern (some had the more traditional two-piece seat and back, but I prefer this design, which came from a Freedom deck chair).  It's really simple if you have some chairs and want to revamp them rather than replace them, and I think it looks better than slip covers over the whole lot.

Well, all was fine until one of my larger nieces visited last summer and decided that using one of the chairs as a trampoline for her bottom would be fun.  Mysteriously she went through!  Luckily I have spare fabric, so today's repair day before the big NYE party tonight!

The fabric:

Each deck chair takes 90cm of fabric (you'll need a piece around 70cm across, so you should get two from a 90cm long section of canvas).

I use the following seam/hem allowances:

  • 3cm at the top
  • 1cm at the side of the backrest
  • 1.5cm to the side cutouts and the bottom
The steps:

  1. Using your existing fabric as a pattern, cut out a new seat & back, remembering to allow for hem allowances and pockets for the dowel at the side on the seat and uprights on the back.
  2. Zig-zag or overlock the side edges of the seat section.
  3. Hem the sides of the backrest and the top and bottom of the cover.
  4. Fold the top in and to make the pockets for the uprights, and stitch across the top plus a double row of vertical stitching.
  5. Fold the seat to create pockets for the dowel to go through, and stitch.


For best results:

  • Wash your fabric beforehand (just in case it shrinks)
  • Check the tension on your machine - I've found that I need to adjust mine otherwise the top is too loose / bottom too tight when hemming the canvas.
  • Use stronger cotton (eg. upholstery thread).
  • Stretch the fabric when you're hemming the curved sections, rather than clipping the corners, as this will help to prevent creating weak points in the seat.

Friday, December 24, 2010

Happy Christmas!


I'm signing off now to spend time with my family celebrating the birth of Christ.  I hope that you have a wonderful Christmas, and that all your gifts (particularly the hand-made ones) thrill their recipients.

A bit of woodwork to round out the year


I don't often get a chance to make something out of wood, but I love to.  I've observed towards that latter part of this year that my younger son really enjoys playing with dolls houses.  He often carries around a Buzz or Spiderman figurine, and when we're at playgroup he loves the wooden dolls house.  We had an old Barbie one but it fell to pieces, and I think that it was just too complicated to capture his imagination.  The idea of getting or making him a wooden dolls house was cemented by seeing some lovely wooden peg dolls on Blue Caravan.  So, this last week I've been making him a dolls house out of old shelving that I'd saved in the garage for a rainy day, some scrapbooking "wallpaper" to cover the state of the internal wall, and "architrave" to cover my carpentry sins.  I hope he loves it - I have those pirates, some wooden furniture and plan a quilt and pillow case for the bed to match his own.

Thursday, December 23, 2010

Super sock softies (or a quick last-minute present)


The sock monkeys started it!  Nanna gave my boys a sock monkey each for Easter a couple of years ago, and along with them gave our household a new appreciation of the potential of socks.  Not long afterwards I discovered some great step-by-step instructions at web goddess, and made a couple of monkeys as first birthday gifts.  My monkeys were significantly chunkier than Bruce (right) and Monty (left), due to the stretchiness of the socks.  Then came Charlie the spider (a male version of the famous Charlotte?) by special request of the then-kinderboy.  Yesterday we added Violet and Fleur to the mix, but only temporarily.  The schoolboy decided that he'd like to make presents for his cousins for Christmas, and these were inspired by an old Family Circle toy book I've had since I was a girl. The boys helped choose the design, the socks, stuffed them and chose the facial features and clothing.  Bigger kids (or grownups with limited sewing) could do the whole lot without too much of a drama.  We finished them off easily in an afternoon, and only needed a trip to the supermarket for the socks.

Wednesday, December 22, 2010

Duo of dotty dresses


This morning I finished a pair of dresses for my nieces - their mum informed me that they like to dress the same, so here's hoping!  Anyway girls, I hope that you like them.  My boys chose the spotty material for you and the schoolboy loves the feel of the ribbon.

Monday, December 20, 2010

Going dotty (part 1)


You might have noticed that my 'grand plan' includes a few dresses with spots, and that two of them absolutely must be finished this week or there'll be embarrassment around the Christmas tree come Saturday.  Well, I'm pleased to say that the first dress now totally finished.  I wanted a design that was a bit dressy, but not so much so that my nieces wouldn't get much wear out of them, so I've only lined the bodice, and rather than have a tulle frill peaking out from under the hem I've put a pink band on the bottom of the skirt.  So that's Miss 2 done, now I need to get onto Miss 5's matching dress.

Sunday, December 19, 2010

A present a 3 year old can make (with a little help)


The young one and I were home alone this morning, so we took the opportunity to make his big brother a Christmas present (I had the stuff last week but was missing the insight required to realise that it needed to be made before school finished).  Our big boy can't survive for more than an hour or two without doing a drawing or some writing of some kind, but his pencil case has gone AWOL, and as a consequence I'm constantly picking up his dwindling supply of pencils.  I thought that this project would give his little brother the opportunity to give and not just receive this Christmas, and save me from constant requests to help our schoolboy find his pencils.

Here's what we did:
  1. I got Dan to choose some material from my quilting stash, then I cut it about an inch taller and wider than we needed for it to go all the way around this mdf container (cheap to buy from Bunnings and elsewhere).  The selvedge of the fabric was presentable, so I made it one of the short ends of my rectangle.
  2. We then painted the sides one at a time with a mix of half water half pva (I would have used straight pva, but discovered at the last minute that I didn't have much left!)
  3. After each side had been painted I laid the fabric over it, starting with the cut end on the edge of the first side.  I smoothed the fabric over, got him to paint the next side, etc. until all the sides were done.  I think he was impressed that he got to paint the material on the first side so that I could stick down the overlapping piece.
  4. I then trimmed the fabric overlapping the top and bottom at the corners to help me fold them flat, then got him to help me paint the flaps of material with pva (again, one at a time to minimise mess), then folded them over the top and into the container.  
  5. Finally, we sat the box upside down on a bottle, folded and glued the overlapping bits onto the bottom of the container, and gave the whole lot a coat of glue mix all over.
When the glue dries (it's hiding in the study wardrobe for now) I'm going to paint it with several coats of clear sealer to protect it. 

Inspired by...


I've just been doing some blog surfing, and come across betweenthelines.  There are some great step-by-step instructions for stuff to make from home, including how to make fabric covered notebooks really simply using Vliesofix.  It got me inspired to make a folder of sorts for the schoolboy.  It's big enough to fit A4 paper (I'm going to give it to him with some new paper in it, but after that it'll be a great way of using the reverse side of stuff from the study).

Here's what I did:


I cut some cardboard to a bit bigger than A3 - the blue sheet is A4 size, and I wanted it a bit bigger all round.  My card was reasonably thick, but you could use a manilla folder if you didn't have anything suitable.


I then cut some Vliesofix roughly to size, and ironed it onto the back of the fabric left over from the pencil box.

I peeled off the paper and then ironed the fabric onto the cardboard (I put the backing paper and some baking paper between the cardboard and the ironing board to stop the overhang sticking to the ironing board).

Next I trimmed the material to the same size as the cardboard (not as easy as I expected to get a straight cut - next time I think I'd use a rotary cutter and ruler, or the idea below).


I hole-punched some A4 paper, and then connected them together with a Tubeclip - this will allow the schoolboy to add/subtract paper from his folder easily, and as its adhesive on the back I could then stick the pages in with no problems.

What I'd do differently next time:
  • I was using leftovers, and had only just enough fabric and an odd-shape (and again, only just large enough) piece of Vliesofix, and didn't do a brilliant job of lining up the pattern with the edge of the cardboard.  I think ideally you'd have a fresh bit if Vliesofix so that you could line up the straight edge with the pattern on your fabric.  
  • I had trouble working out where the edge of my cardboard was when I put the fabric on top of it, which made lining up the pattern even more difficult.  Next time I'd put the fabric face-down and then the cardboard/book on top of it.  I think you'd be able to see through the fabric to line up the pattern more successfully that way.
  • The overhanging Vliesofix was a bit tacky after I'd peeled it off the baking paper after stage 3.  I'd be tempted to leave an overhang all round like you do when you're putting Contact on a book, and fold the edges in the same way.  That way the edges are protected and you don't have to worry about making sure that the edges are cut perfectly straight.

Monday, December 13, 2010

Palm oil & life without shampoo


I've signed several of those postcards at the zoo which call for products using palm oil to be labelled so that we can make informed choices about whether or not we buy them, and thereby hopefully save the habitat of the orang-utan (and no doubt many other creatures that aren't necessarily so cute & endearing).  I've wondered about my consumption though, and what I could do about it.  I say wondered, and that's about it.  It did cause me to look at the back of my shampoo and conditioner bottles and wonder what all those chemical names really meant, but until now I haven't done much else (except stop buying a product which clearly labelled that it had palm oil and was an inferior product to my regular anyway).

Well, I've decided that its probably time to do something about it, and I've found a couple of websites which might be of interest if you want to take things a bit further as well.  The first one is the  Rainforest Action Network, and buried in their site is a list of products containing palm oil.  The site's American though, and I wonder about the list's completeness particularly in the Australian context and in terms of cosmetics.  The next one is Australian (the Palm Oil Action Group) and its shopping guide gives the names given for palm oil, which I found helpful.  What I found was that my shampoo lists Glycol Distearate as being the 4th largest component of the product, behind good old water and two ammonium-sulfate based chemicals, and this is one of the names given to palm oil.

So, where to, and what are the options?  Well I've bought a couple of sauce bottles, and I'm going to try life without shampoo following Melinda's instructions on One Green Generation.  I'm no hippy, and I usually have to wash my hair every day otherwise I start to look like Neil from the Young Ones, so we'll see how it goes, but I figure nothing-ventured nothing-gained for the Orang-utans.

I'll report back in a couple of weeks and let you know how things are going!

Thursday, December 9, 2010

Crafty Women

This year I started a monthly craft evening which my husband nicknamed "The Crafty Women" or "Craftier than Crafty Women".  The idea was that every 2nd Thursday of a month my friends were free to come over to my place to craft after dinner/kids were in bed.  It didn't really take off unfortunately, so I've jumped at the chance to be part of the my creative space crew.  Well, that's not on today either, but I've finished off some fairy skirts and I'm off downstairs shortly to:

  • Prepare the pattern so that I can cut out the fabric for my nieces' christmas dresses
  • Make some 'x marks the spot' bookmarks from a cute butterfly scrapbooking paper that I bought today
  • Wrap a Christmas present that might be discovered if I don't do it quickly!

Tuesday, December 7, 2010

Fred & Cissy

Fred and Cissy (actually Alfred & Gertrude) were my dad's maternal grandparents.  To the best of my knowledge they died before I was born, but I have the letters that Fred wrote to his sweetheart on the boat across from England in 1912-13.  He came to Australia ahead of her to find work and get settled before she made the trip and then they were married.  Dad also has a poem that his grandfather wrote (or appropriated) for their golden wedding anniversary so many years later and he was evidently as smitten then as he was on the boat across.  Since I inherited the letters from my Grandma I've been fascinated with them, charmed by their love for one another and aware of the sense of humour they must have had (one of the few photos dad has of them has Sissie and another lady on either side of Fred.  They're holding silverbeet and he's holding a teddy bear with a grin on his face!

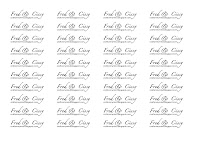
Anyway, I decided that I'd label some of my craft stuff, so I've made labels tonight honouring them.  I hope that if you receive anything with a Fred & Cissy label it'll give you a smile to match Fred's in that photo!


If you want to make similar labels here's what I did:

  • I made the labels in Word.  I experimented with Word Art, and obviously you could use pictures if you like, but in the end I just used text in a table (no gridlines) - it was a lot less fiddly than trying to align multiple pictures/frames into neat rows.  I got 5 columns and 10 rows onto the page in landscape format using this method:  
  • The tricky bit is that you need to 'mirror image' / horizontally 'flip' the text and any image.  On the Mac I saved the Word document as a PDF, opened that in 'Preview', saved it as a JPEG, and then flipped that horizontally (for some reason it'll flip a photo but not a PDF).  I've had a look at our PC, and the most straight-forward way that I can find so far to flip the text is to make sure that it's inserted in Word as Word Art.  You can then click on the 'draw' tab and then 'flip horizontal' on the drawing toolbar.  I tried inserting it in an auto shape, but the shape mirrors and the text stays the same.  The other option would be to create your label in Paint, flip it there, then insert it multiple times as a picture in Word.  Both options are not particularly user friendly in my opinion, so if you come up with a better way let me know!
  • I printed a sample and checked it in the mirror just to be sure, then printed it onto some iron-on transfer paper from Lincraft (it comes in a pack of 5x A4 sheets).
  • Cut the labels, leaving as little blank paper around them as possible (I used a guillotine to cut them into strips, and then cut them into separate labels from there, so that I could put space between them on the tape - if you were less stingy with your use of the paper (eg. had 3 or 4 columns instead of 5, then you wouldn't need separate them out).
  • Iron them onto cotton tape following the instructions on the paper packet.

Sunday, December 5, 2010

Inspired by (2)...

I feel like I'm hyperactively crafty this week (and yet somehow I've missed doing what I said I was going to, and haven't started the dresses for my nieces) - my latest offering was inspired by Samelia's Mum's mug-rug.  Our prep class have watched caterpillars hatch, grow, form a chrysalis and finally transform into Orchard Butterflies.  I think that the teacher's been at least as excited by the process as the kids, particularly with the first butterfly coming out of its chrysalis on Friday.  Don't tell, but I've made Mrs K a 'Very Hungry Caterpillar' mug-rug to be paired with some related goodies.  Refreshingly quick to make (I started it after dinner last night, and finished it about 24 hours later), and I really enjoyed the pictorial style - I can see myself following it up with a quilt-as-you-go project down the track.

Inspired by...


Ever since I saw some cute 'x mark the spot' bookmarks on the kootoyoo website, I've been wanting to make a truckload of them as gifts and to replace the envelopes and old receipts that always seem to end up as my bookmarks.  Well, I've sorted my magnetic issues, and yesterday I made one.  I was a bit dismayed by how clumsy the end product looked (brought about, I suspect, by my impatience and use of a sewing machine rather than hand stitching - I'll try again another time), but I really like my paper variants.  I've made a couple, and coated the scrapbooking paper with contact for durability.  They're great - you can hold the book upside down (or put it in your handbag) and the bookmark doesn't fall out, and I think they're easier to find in the book than the traditional version.  Thanks for the inspiration Kirsty!

Saturday, December 4, 2010

Kid-friendly Christmas garlands


Thought I'd share with you our family Christmas version of the paper garlands at art as life: what is to be is up to me.  My ideal was all white stars, but the boys were insistent about using their new Christmas stamp (I got both the stars and the stamp from Riot).  Result was so effective that the neighbour across the road came to see if we had new fairy lights!  Maybe one day I'll get my simple version, but in the meantime this's a very kid-friendly craft idea for Christmas. If you'd like another Christmas alternative / a 'how to', check out the snowflake version at maya-made.

Wednesday, December 1, 2010

Free fabric from my stash!

 This week in my creative space I've been cleaning up.  I have found three pieces of fabric to kick off my monthly 'stash swap', where I'm offering to give you part of my stash for the cost of postage, and inviting you to swap something from your stash that's been sitting around a long time (see below and separate tab).  In the interests of reducing my fabric store I've also cut all the tulle I have left, and have found that I have enough for five more fairy skirts.  Not sure what I'll do with all of them yet, but for the moment it's a good side project that's helping me avoid thinking about the Christmas list.

Tuesday, November 30, 2010

Stash Swap

Today is the start of my first monthly 'Stash Swap'!  Well, not so much a swap as a giveaway really.

The plan is this: I'm going to take photos and give a description of some things that I want to get rid of. If you want them, just leave me a comment, and I'll get in touch. You post me an appropriately sized prepaid parcel post satchel, and I'll send it back complete with the fabric. Easy! The idea is to get the fabric used though, so if you receive some please try and use it within a month or two.  You can choose to be either the giver or receiver (or both) of some stash.

I've been through my stash, and as much as I promised myself I'd be ruthless, there are a number of sleepers still there because I am not ready to part with them yet. I have three pieces of material up for grabs though:

 I think this material has been in my stash longer than any other.  Its a fine suiting fabric, but I'm not sure what it's made of.  I love the feel of it, which is why it has stayed in my stash for at least 15 years even though I'm not into wearing green at all!  It's 148cm wide and 1.6m long.  It'll fit into the smaller size prepaid satchel (which costs $6).


I have no idea where this pink background cotton fabric came from!  It's evidently been used for something, as it is L-shaped.  There is a 98cm long section that's the width of the fabric (115cm), with a 60cm long by 54cm wide piece beneath it.  This one will also fit into the smaller size prepaid satchel.


This is some leftover curtain fabric (unlined) from a roman blind I made for a kitchen in a house I moved out of a long time ago!  The main section measures 47cm by the width of the fabric (145cm), plus there are other bits and pieces.  The fabric is 100% cotton, and I think it would be best used as the basis of a quilt, and if I were into 'country' then that's what I'd do with it.  Altogether there are 56 17cm x 16cm "squares", plus several part squares (I have the breakdown of what type of squares there are if you're interested, but in addition to those shown there are other florals, a rooster, bull, plough & sheep - a total of 15 different squares).  Again, it'll fit into the smaller size prepaid satchel.

If you're interested in having any of this fabric for the cost of posting it to you post a comment (you'll need to say which fabric you're after and make sure you leave an email address).  If you have some stash you'd like to 'swap' or want to see what others would like to pass on then click here.

Monday, November 29, 2010

Of grapes and green striped dragonflies

What a beautiful day! I can't believe how lush and green the garden's looking with all of this rain - I'm not a waterer so my plants can't believe their luck with the weather we're having. The weeds also think they're in heaven, but that's another story.

I gave up on the husband actually getting around to planting grape vines in the designated 'vineyard' (along the back fence) over winter and succumbed to the kids' pleas for a sultana grape. I planted it at the time, but today at last got around to puting up wires to train it onto. Found a great publication by the University of Missouri showing the stages of pruning, how far apart to put the wires etc., but am now a bit demoralised by how many years it will be before we see fruit as the vine only comes half way up to the first wire.

The boy and I were amazed by this dragonfly which stayed on the fence the whole time I was working (with an electric drill and screwdriver right next to it) and well beyond. Not sure if you've ever had the opportunity to see one up close, but they have amazing green markings on their body and tail which this photo doesn't do justice.

Hope you've had fun outside today too!

Thursday, November 25, 2010

My apologies...

... for the continuing changes to the appearance of my blog.  I can't help fiddling!  I spent far too long on the Yummy Lolly website, then decided I should just use up some of my soon-to-expire Shutterstock credit.  This's a bit cutesy for me, but we have a household fascination with dragonflies, and I can tile it across the page without a drama, so it wins for now.  Really what it comes down to though is that I'm procrastinating about the work I need to do (one of the perils of working for yourself from home) and the crafting that I should/would/could be doing.  I promise not to change the background / layout / colours again for the next week!

Check out this lovely Christmas giveaway

I've been doing a bit of blog-surfing via the Kootoyoo site and found 'Designed to a T' - looks like a great site (when I've checked on Mr 2 downstairs I might sneak up and have a bit more of a look...).  Anyway, I've become a follower and really love the Christmas tags Terese is giving away.  I'll be back to check it out  after some art and craft with the toddler!

Wednesday, November 24, 2010

My creative space


I have finished the Trouser Project (I've another pair of threadbare pants now though, so the project may make a reappearance).  Very happy with the finished product!  Just waiting on some goodies to put in it before sending it north for Christmas.

So, in my creative space tomorrow I'll be turning this small stack of pink into a frothy birthday present fit for a fairy!

Tuesday, November 23, 2010

Trying hard to resist temptation


I have wandering eyes.  I can't help it.  Every time I drive past a hard waste pile I just have to turn and look.  Who knows what treasures might be there, hidden amongst the discarded televisions and cushionless couches?  We were driving home on Sunday night when we passed a pile which looked like it held the contents of someone's lounge room - couch, television, tv cabinet, a picture frame and this little treasure perched on top.  I turned around and went back, my husband protesting, but I think it was worth the sighs and rolled eyes!  The only problem is that now my mind keeps on wandering to it and what it'd look like filled with something red and sparkly for Christmas.  Or maybe with something soft and tactile.  Hmmm need to focus: have to finish the trouser project and a fairy skirt this week, or my Christmas present plan will unravel.

Saturday, November 20, 2010

How many weeks is it until Christmas?

I've planned a very crafty Christmas.  You know - make as many of the presents as possible, that way they're unique, personal and hopefully you save a bit of cash along the way.  I've been doing a mental tally of the list though, and am getting concerned at this point.  Here it is in black and white:

  • Finish the Trouser Project bag (I cut out the pieces last night and in theory they're ready for embellishment, but I'm obsessing about one of the pockets that I've added and I think I'm going to redo it).
  • Make a dress each for my two younger nieces
  • Make 2-3 fairy skirts
  • Finish a photo album for my older son
It's a bit embarrassing that I've already culled the list, excluded the 'little' things like Christmas cards (soon to be relegated to next year again I'm afraid), and to say that I'd also like to finish the curtains that I'm making for our bedroom and make myself a dress, plus I've been looking at the trouser bag pattern and thinking that it'd be really cute to make little girl versions to go with the dresses (one side out of floral/spotted material and one plain, with a contrast binding)... [deep breath].  Hmm, and I need to work, look after the kids, etc..  Lucky my husband doesn't read this, or he'd be rolling his eyes!  I plan to finish the trouser bag and one fairy skirt this week, then take it "one week at a time" - wish me luck!

Thursday, November 18, 2010

The project begins...

Yay, its Thursday!  Tonight I plan to make a start on the 'threadbare trouser project'.  Looking forward to getting out the scissors and 'quick-unpick' and attacking the pants.  These pants are actually in quite good condition, but the aim is to salvage the best bits of the fabric (bottom of the legs), plus the waistband, pockets and any spare buttons, then work out how to shoe-horn the pattern onto it...

Looking forward to hearing what you're up to in your creative space today!

Wednesday, November 17, 2010

the threadbare trouser project

I have a handbag that I love - just the right size (well nearly, if it were a smidge bigger I could get an A5 notepad into it and that'd be great), right number of pockets, the strap goes diagonally over my shoulder so it doesn't fall off and I can use both my hands - I have vowed to keep it forever.  The problem is that my 'made in china' bag wasn't made to be kept forever.  The lining has fallen apart, and doesn't seem to be fixable - oh the tragedy!

Strangely enough the answer came in a work expo and a pair of threadbare trousers...

At the expo I was given a bag of handouts.  The handouts were so-so (most went straight in the recycling), and the bag's handle was annoyingly short, but the design was bliss!  One pattern piece, cut it out twice, sew it together, and you a nifty handbag that you could resize a little and use for the beach / a nappy bag.  Make it out of a pair of suit trousers and you have the makings of the world's best bag - slightly bigger than my old bag, button up pockets inside for things you need to keep safe, a zipper across the top, and even a separate pocket to keep the mobile/car keys within easy reach.

I added the dragonflies along the way (the material has a red line through it), hubbie wasn't wearing them that way at the office!


  I've been so impressed by the way the bag's worked out I'm going to make one for a female relative I have in this year's Kris Kringle (here's hoping she likes it!).  I've gotten a pair of pants from Savers - probably too good to cut up, but they don't sell pairs with holes in them :(

Thursday, November 11, 2010

From tulle on to threadbare trousers...

Thank you to everyone who has asked about / bought a fairy skirt.  I'm off to school tomorrow to add $95 to our class stall's total for the fair, as I've now sold all of them!

I've a couple of projects I need to start for Christmas (OK at least 3 to start and a major one to finish).  No details just yet, but if you're keen to know exactly what you can do with a pair of suit trousers so threadbare that they have a hole in the crotch watch this space (digital camera's gone AWOL otherwise I'd give you a bit of a hint)!

Wednesday, November 10, 2010

Tulle update!

Thanks for your support everyone, I think that I've sold all the skirts!  A few have been tentatively set aside though, so if you're after a skirt let me know and I'll get in contact once I've heard back about them.

Tuesday, November 9, 2010

Tulle, tulle and more tulle!

Sunday was the Rosanna Golf Links Primary School Fair (try to say that three times fast!), and I'd made 36 fairy skirts for our class stall.  My son was glad to see what he thought was the last of the skirts, as he'd been embarrassed by the fact that half of them had been housed in his wardrobe for a couple of months!  Unfortunately for him I have some left, so the main purpose of setting up this blog is to let you all have a look at them so that I can sell the rest, give the money to the school, and give my boy his domain back!

So, here's the deal:

I have 9 'Tinkerbell' style fairy skirts up for sale, with the proceeds to go to the Rosanna Golf Links Primary School.  Each of the skirts has one layer of 'fancy'/glittery tulle and two layers of plain tulle.  They all have elasticised and adjustable waist, fitting over hips up to 80cm around.  We were selling them for $15 each at the Fair, but you can have them for $10 each, first in best-dressed in terms of colour and detail.  They'd make a great addition to a dressup box / Christmas present.

If you're interested you can call me / email me at crafty-woman@live.com.


If you want to specify a specific skirt refer to the row and whether what you're after is left / centre / right.
The skirts in the middle of the first row and left of the second row are the same as one another.

LinkWithin

Related Posts Plugin for WordPress, Blogger...