Monday, August 27, 2012

Love the A-line

Have you checked out Nicole Mallalieu's A-line skirt pattern yet?  I've had a hankering for a new skirt, 'just' the fabric in my stash, and amazingly no A-line skirt pattern in my collection.  I bought Nicole's pattern, and am so glad I did.  I made this skirt yesterday while the Cyclist and the boys were in Bendigo for the day, and was waxing lyrical about it by the time they got home.

The pattern comes together really well, fits fantastically (she includes an instruction of how to modify the pattern if your waist is a size larger than your hips), and definitely doesn't look home made.  Its also very adaptable.  I've cut out a second version which I'll show off as soon as I've got it finished to show you what I mean.

Here's the details of my 'butterfly skirt':

Pattern:  Nicole Mallalieu's A-line skirt
Size:      12 

Modifications:  

  • Trimmed the yoke by 1" at the waist to make this measurement equivalent to a size 16. 
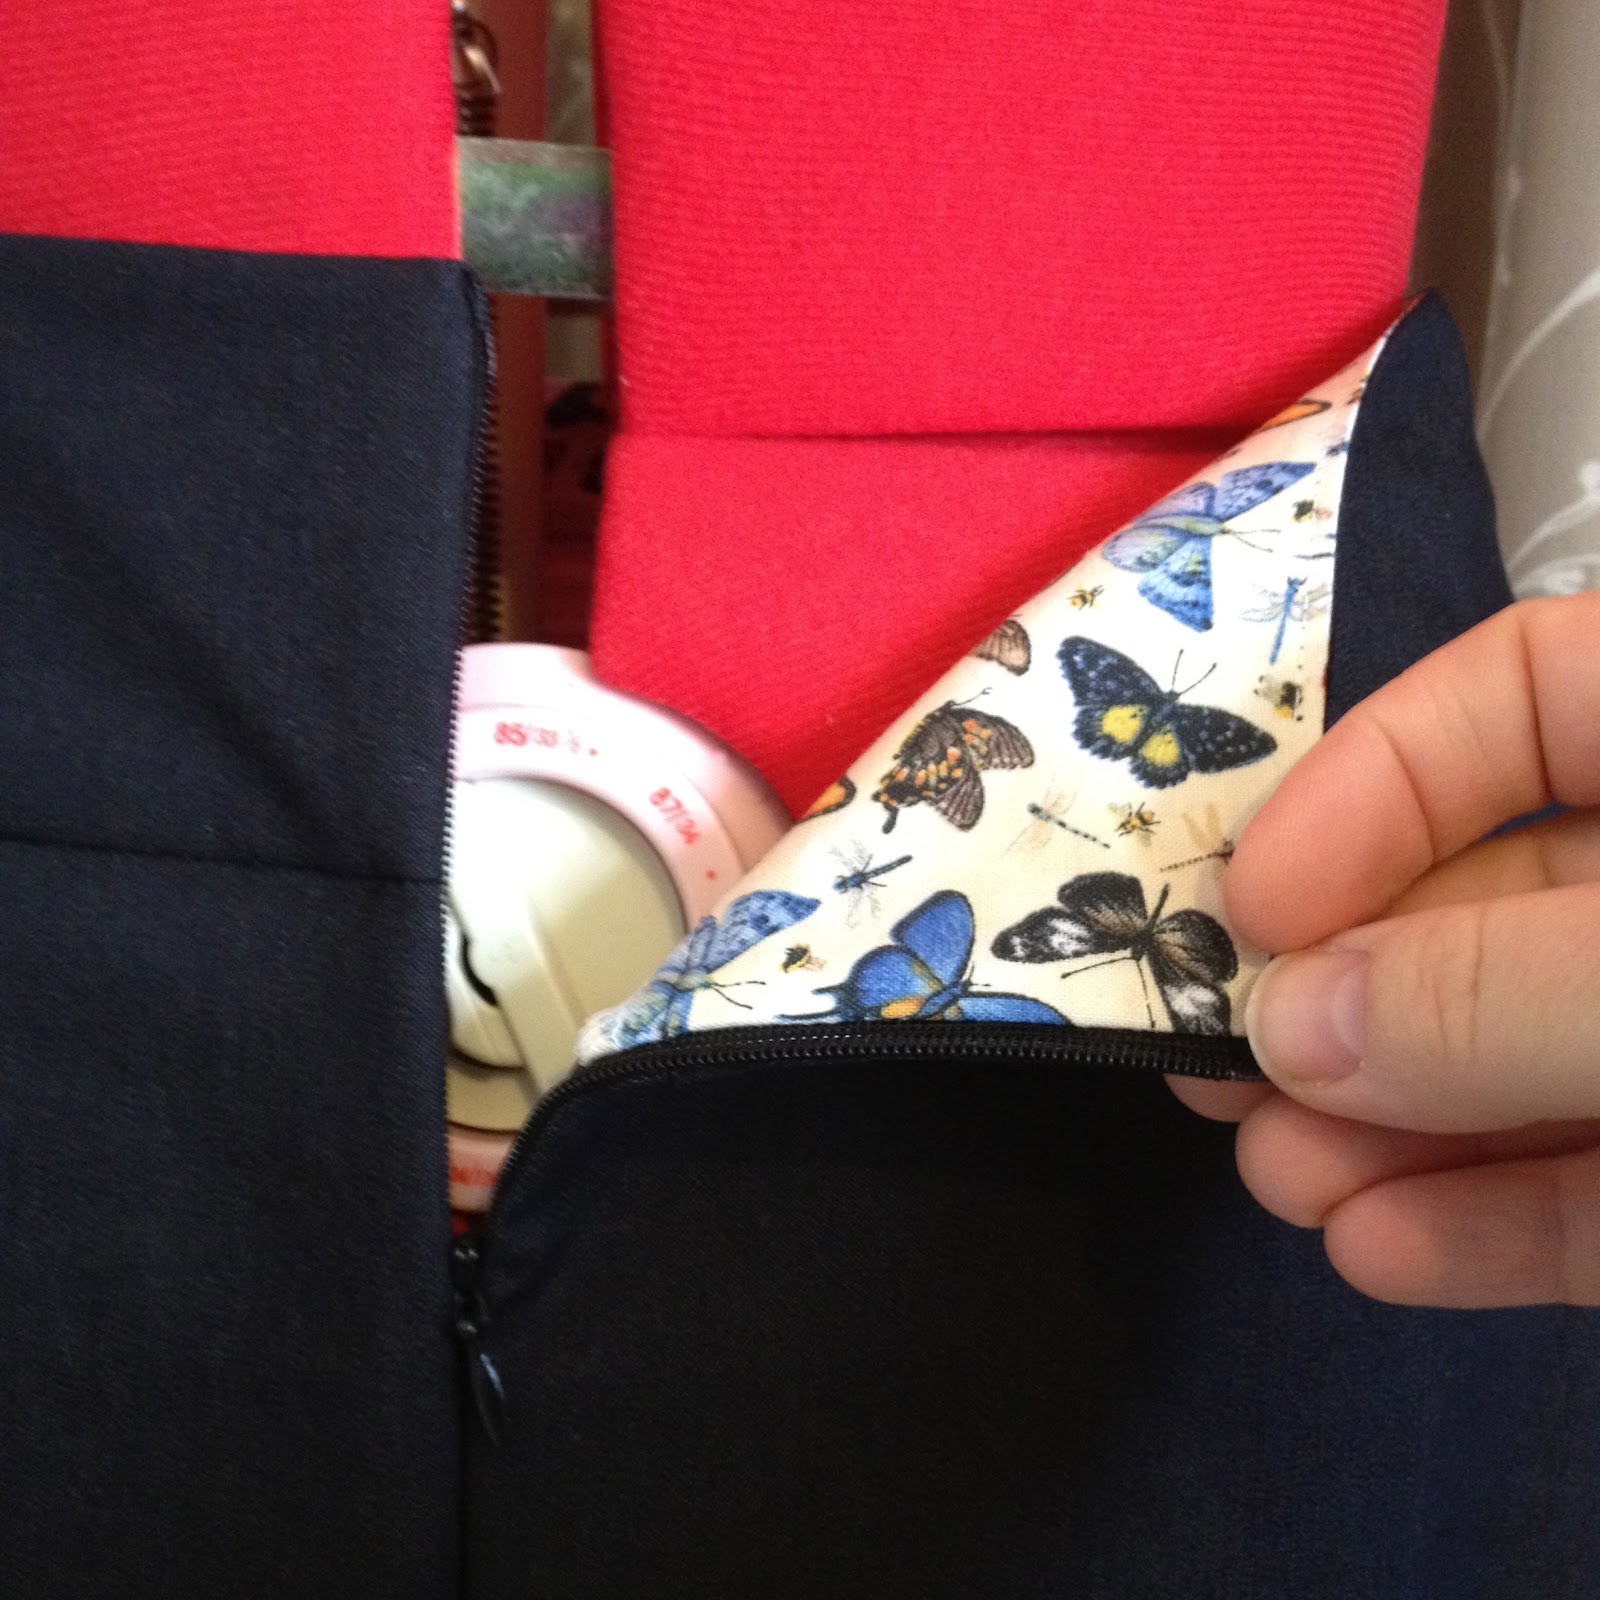
  • Added a panel of butterfly print fabric (underlined with a white poly-cotton) to the right side of the front.  Nicole suggests that for denim you can applique the panel over the top of the base fabric.  I found that the combined weight of the print and the poly-cotton was similar to the denim, so I pieced the front instead.
  • Added a side pocket on the right side.

Butterflies in my pocket!
Materials:  
Black stretch denim and a remnant of  'Illuminating Spring' (by Stephanie Marrot for Wilmington Prints) from the stash

Lessons/Comments:  

  • Nicole's directions really are fantastic.  They gave me the nudge I need to try blind hemming for the first time.  I also used the same foot to help me edge stitch and stitch in the ditch more accurately.
  • My feature panel's 1/4 of the width of the front piece, which's probably a little on the small side.  
  • This was my second attempt at putting in an invisible zipper, and the first time with my new invisible zip foot.  Her instructions are really good, and I was thrilled with the results yesterday.  Looking at the photos, my job's not perfect, but I suspect that no one else will notice.

  • I love this skirt so much that today I was tempted to tuck my top in to show it off, something that hasn't happened for a long time (probably since the waist grew to be two sizes larger than the hips!)
More butterflies on the inside


Thursday, August 9, 2012

Necessity is the mother of invention


That's it.  That's my secret to staying creative.  This picture symbolises this truth for me, because you're actually looking at my peg bag.  When I moved into my first house 16 years ago I had no spare cash at all.  I bought pegs, but didn't have a peg bag.  I did have this old doctor's style handbag that I wasn't using.  It turned out to be an excellent peg bag - I hang it across my body, with the bag at the front, and it sits open with the pegs within perfect reach.  My mother in law felt sorry for me once, and bought me a new peg bag.  It was very attractive, but made its way to the op shop without so much as being used (sorry A!), as I'm totally sold on what I already have.

For me, sometimes necessity is a financial imperative like this.  Other times its not wanting to see something go to waste (such as the bookcases I inverted here, or any of my fantastic finds), the endless optimism of my children ("of COURSE you can make a Flash / dragon / Trash Gordon costume mum"), or a self-imposed challenge (eg. Pillowcases 6 ways).

If necessity fosters my creativity, for me its hampered by disorganisation.  I'm all for taking time to ponder things, but taking time out of the creative process to search for things is just frustrating.  I'm getting better at this, and my craft cupboard is now neatly boxed and labelled (the boxes and labels are 75% actual and 25% aspirational at this point in time).  That didn't stop me from spending over an hour last Friday morning looking for the curtain wire I needed to attach the fabric to the desk screen I was finally finishing 8+ months on from moving office, but it has helped.  If nothing else it has introduced a new necessity - the need to use up my stash and stop buying fabric, so that everything will actually fit in the boxes!

I have a love-hate relationship with Pinterest too - great for organising ideas, and stopping myself from endlessly trying to find 'that' picture I saw on 'that' blog 'somewhere', but also a time waster in itself.

I'm off to do 1/2 hour of actual crafting (the Cyclist is on the school run as its a blue moon), but later I'll be back to see what everyone else places as their top tips.  See you soon!

Wednesday, August 8, 2012

In praise of peach boxes


Last week Kirsty put out the call to people on the My Creative Space page to blog about their top tip for staying creative.  I've been thinking about it, and I think that I've come up with my answer (more of that tomorrow), but in doing so I was reminded about the importance of time management in the whole creative endeavour.  I've spent way too much time over the years looking for things that I know that I have, and earlier on this year I adapted a storage idea I've been using for the kids toys for years: peach box drawers.

I love peach boxes.  I wait for peach season because of the boxes more than the fruit.  I've been meaning to dedicate a post to them for some time:

They're strong.
They're a uniform size.
They're stackable.
They have holes you can use as finger pulls.
(If you paint them) they look great.
Things look instantly neater when they're put in them.
They last better than plastic.
When you're done with them you can recycle them.
They're free.

Brilliant!

Here's how I use most of our collection at the moment:


(The one draw-back that I found was that I can't quite get two across into my craft cupboard, hence the mess to the right, but more of that tomorrow too.)

I first brought peach boxes home from the supermarket about 5 years ago, and am pleased to report that they're still going strong despite continuous use.  I have (and still do) use them for the kids toys.  Originally I took photos of the toys which they were supposed to contain, covered them with contact, and tied them on between the holes in the boxes.  In theory that meant that the kids could put their toys away properly.  In practice it made it easier for me at least!  I'm a bit gentler on my boxes, and for my labels I folded plastic A5 sheet protectors and attached them to the boxes with double-sided tape.  I made sure the slot in the top was accessible, that way I can change the labels when I like.


What's your top creative tip?  I'm planning to join up tomorrow and have my say.  I'll be looking forward to seeing what others come up with too.

LinkWithin

Related Posts Plugin for WordPress, Blogger...