Thursday, December 13, 2012

Mayhem

Today's the start of 2 1/2 weeks of craziness in our household - three birthdays and Christmas in the space of 19 days.  Here's a quick rundown of what I've been up to in the lead-up to birthday season...


I made two lengths of this felt bunting (no-fray => less stitching required) to decorate the church hall for the kids' party.  I printed the letters onto paper, then cut the paper and felt together and stitched them on with a straight stitch.  Reasonably quick, and we'll use it for years to come.


Made to measure felt crown (double layer of felt for more body), with lace and ric-rac that used to belong to my Grandma.


The Kinderboy and I picked just under 11kg of [tiny but sweet] apricots from our tree, then enlisted the Ipswich nieces to help us sort and cut them.  We gave away some, ate some, and swapped some for lemons with the lady across the road, and now I have 15 jars of apricot jam cooling downstairs (not the best job on a 35 degree day, but the apricots don't give you a choice!)


Last of all, I had a morning off and finally finished some stretch linen pants for myself from the Spring/Summer 2012 Ottobre Woman magazine.   Strangely, I had to shorten them by 20cm to get to the length shown in the magazine.  I'm short, but not that short, so I'm not sure what the story is - its the first time I've used any of their women's patterns, so I guess I'll keep an eye out on sizing in the future as well.  Sorry about the lack of modeled shots - I'm lousy at taking them myself, and too self-conscious to ask the family to do it!


Next on the agenda are some class Christmas cards (as shown here), and finishing off some Christmas presents.  I have a hankering for new clothes for myself though, and Darn Cheap Fabrics has a sale on, so a diversion may be on the cards.  In the meantime, I'm going to settle for heading over to Village Voices for more crafty ideas (it's where I first saw the cards too).

Friday, November 30, 2012

Short orders

In celebration of National Recycling Week (or because my 'revamp/repair' box was overflowing), last week I whipped up a couple of T-shirts for the boys from three that the Cyclist had discarded plus a bit of my ever-present red cotton.  I say 'whipped up' as if it were no trouble at all, but truth be known that this time last year I wouldn't have even attempted it.  Its amazing what 12 months, a twin needle and an overlocker will do for you!


I used the Headphones/Globe Kids pattern from Ottobre 3/2012, but rounded the neck.  Based on my experience with this shirt, I checked the pattern pieces against some of our existing T-shirts, and ended up sewing a size 134 for both boys, even though they measure a size or two smaller.


The only complaint?  The Cyclist wished that I'd slimmed the shirts down for him instead.

To round it out I made this little 'Sweet Dress' for the youngest.  Using broderie anglaise made it even quicker to sew, and I'm proud that I managed to go from the fabric store to finished product in less than two days.  Considering that most of my stash takes a decade or so to see the light of day that has to be some sort of record!


Instead of wholly encasing the neck elastic I put two buttonholes through the dress front before sewing the casing, and threaded through elastic with some ribbon on each end.  Hopefully that way it'll grow from a dress this summer to a top next year.  I also left off the armhole elastic.


I've been blessed with an unexpected free hour or so, so I'm going to amble over here and here and link up and check out what others have been up to.  Thanks for stopping by!

Wednesday, November 14, 2012

In miniature

I'm still going on my 'clothing baby' projects (I have some more clothes nearly ready to show you), and I haven't forgotten my promise to make the Kinderboy a shirt, but in a side project I've made baby a little bear of her own.


This little bear measures just under 12cm in height, and I have to admit that I came across it accident.  Some time ago I knitted all the parts to it, but stopped at that.  It has been buried in my scrap wool pile ever since.  I'm not sure who the original recipient was intended to be (although I suspect that it was the Schoolboy), but as every baby needs a teddy I've finished him and handed him over to Cate for safe-keeping.

Thursday, November 8, 2012

Clothing baby

My little one is into dolls.  She's not even one yet, but fell in love with this little Berenguer baby at the op shop a month or so ago.  I bought her with the intention of washing her up, dressing her, and then presenting her as a first birthday gift in December.  The only problem is, that she's been floating in and out of boxes and bags as I try and work on clothing, and each time the Newbie smothers her in kisses and I feel mean packing her away again.  Its very cute, but I'm determined to stick to my guns and clothe little 'Cate' before handing her over.

I'm working on some knitting as well as sewing projects, but this is the first one that I've finished:


It's from the 'Nakey Baby' project over at The Blueberry Moon.

Modifications:  
I used a woven fabric, and found that I needed some added width to make it go over my baby's arms.  I increased the width of the sleeves by 5.5cm, and if/when I do it again I'll also widen the body sections a little for ease of dressing.

I increased the length of the pattern slightly, to match the scrap that I was using.  It turned out to be equivalent to the depth of the top and bottom hems.

Lessons/Comments:  
The bodice sections would make the good basis for a 'pillowcase' type dress.

For reference, my baby is around 13" long.

I'm linking up over here, so I'll see you there once I've actually done some paid work for the morning!

Monday, October 29, 2012

Shirt for the Schoolboy

I've finally finished the shirt that I was going to make for the Schoolboy during Kids Clothing Week.  I've been plugging away at it bit by bit, and am really happy with the result:


I took a long time lining the pattern pieces up on the fabric for this shirt, and I love the 'invisible' pocket (and his amazement when he found it),


am really proud of the way the back and the yoke line up,


but not sure why it is that I cut the right sleeve out upside down (or why I didn't realise exactly what was wrong with it until the shirt was finished)!

All fabric and button choices were the Schoolboy's.

The pattern is 'Apple' from the Summer 2010 Ottobre magazine, altered to include some snippets of red gingham.  This's the first of the kids patterns I've sewed from the magazines, and I have to say it seems quite slim fitting.  My boys are very different builds (same chest and waist measurements, but 10-12 cm difference in height), and the Schoolboy is both slender and likes his shirts slim-fitting.  I used a size 128 to match his height even though his chest was smaller than the size chart, and am glad I did - a narrower fitting may not have been big enough.  As it is he's slightly miffed that I'm going to make his brother's shirt the same size!

Thursday, October 18, 2012

Miniature


Have you been watching Kirsty's neon creations unfold?  I've been trying my hand at some crochet, and whilst its not quite neon, this pink is definitely on the bright side of my comfort zone.  In contrast to this square though, I've been using a single thread of sewing cotton and a 1.5mm hook, giving this little number a finished width of just over 3.5cm.  I think the hook is a bit big for the thread though, and am part-way through one with an even smaller hook.

Oh, and I haven't forgotten the promise in my last post - the crochet is strictly an 'in transit' project, and I have shirts in the pipeline...


Monday, October 15, 2012

KCWC: Leila & Ben's Sweet Dress #2

Hmmm.  Kids clothing week was supposed to be about the boys.  Can't really see either of them wearing this little dress:

The youngest, however, is rather taken with it, and Melbourne may even warm up enough for me to put her into short sleeves sometime in the next day or so.  KCWC is officially over, but I'm going to keep going at it (half-paced as I am, my counter is currently up to 3:41:07.9), and boys shirts are next on my list.  I promise boys.

Here's the details for the spotty dress:

Pattern:  Leila & Ben's Sweet Little Dress 
Size:      12 months

Modifications:  
As with the previous version, I used my overlocker for all of the seams.  I also straightened the hem, because a curved bottom just looked strange with all those dots.

I'm thinking of adding a little embellishment on one of the dots, but more of that later (I still need to be convinced that she won't eat what I have in mind!)

Materials:  
Poly-cotton from my stash, left over from these dresses.

Lessons/Comments:  
I learnt from my mistake last time round, and tried it on her before cutting and stitching the elastic.

Wednesday, October 10, 2012

KCWC: Leila & Ben's Sweet Dress

Afternoon!  My KCWC counter is up to 1:55:37.0, which means that I 'steal' more sewing time during the day than I had realised.  Perhaps I should keep the timer up, to make sure my "I'll just be 5 minutes boys" sewing sessions don't routinely turn out to be 25 minutes like this morning's one.  Anyway, enough of the guilt trip, here's what I have to show:


Here's the details:

Pattern:  Leila & Ben's Sweet Little Dress 
Size:      12 months

Modifications:  
I was inspired by this dress, and gathered the neckline and sleeves onto a knit band rather than using elastic in a casing.  I cut the bands the same length as the elastic specified in the pattern, and made them 4cm wide.  The top is also shorter than the pattern (more tunic rather than dress length), based on the length of the brown top I started with.


Materials:  
All from the 'For repair or remodelling' box in my cupboard!  The front and back are from an old top of mine, but as the sleeves on it were too narrow I used fabric from another top for the sleeves, and part of a third for the band (my original top also had blue sleeves and a white band around the neckline).

Lessons/Comments:  
Peasant dresses/tops are super quick and easy (I nearly doubled the time involved by using the neck and sleeve bands), and I'll definitely be making more.  


I finished this dress before trying it on the young one, and found that the neckline was way too big for her.  So my dilemma now is - do I pull the neckband off and make it smaller, or wait until next year for her to wear it (this neck and armholes are similar to some size 2 tops I have).  I love it as it is, so I think I'll put it away for now, but the lesson is definitely to try things as you go if you're going to modify patterns (and also be suspicious and check if a pattern tells you to cut the same length of elastic for a 1 year old's dress as a 5 year old's!).

Tuesday, October 9, 2012

Kids in the Kitchen

I love making kid-size apron and chef's hat combo's.  I've done a few as presents since first making a set for my Schoolboy about 5 years ago.  The Kinderboy went to a friend's birthday at Kids in the Kitchen on Saturday.  They had heaps of fun, and I thought that a hat and apron would be appropriate.  I finished it after the party though, so they've made their way to their new owner this morning.

His mother would describe her son as a 'wee little one' (she's a Kiwi and 'wee' is a description I love to hear her use, but somehow it doesn't sound right in an Aussie accent), so the hat's adjustable in case he still wants to wear it when he's bigger.  Six buttons and four buttonholes 'cos my velcro is way to stiff and scratchy.

Don't you love the fabric!  Just the right level of cuteness for a 4 year old I think.

You might have noticed that I've added the Kids Clothing Week logo to my side bar.  I've signed up, and am determined not to cheat and count Saturday's sewing towards the week.  However, life being what it is I can't see any sewing time on the horizon, and I've decided to use my phone's stop watch to tally up the week's sewing to see if I've met the overall challenge or not.  How about you, have you signed up?  What are your plans for the week?


Tuesday, September 25, 2012

Clean out time

Did you know that this week is the inaugural National Op Shop Week here in Australia?

What's it all about?  Well, apparently whilst we're shopping at op shops more we're not remembering to re-stock them with our own unwanted clothes.  Being school holidays, I thought it was about time that I added to the boxes I started filling with stuff a couple of weeks ago.  The dilemma now though is should I purge straight away and get them out of the house, or should I wait and donate them to the school fete?

For more details you can check out Peppermint Magazine (where I first heard of the Week), and the Do Something Near You website.

Wednesday, September 19, 2012

Butterfly specimen art

I have a piece of artwork underway for the girl's room.  It's way too complicated, and as a consequence is going no where fast.  I feel sad for her that the only things hanging on her wall are a group of five blank canvases (for the aforementioned artwork) and a clock.  So, rather than actually make progress on the first project, I've completed a quick fix in the last couple of days:


I'm the first to acknowledge that this is certainly not an original idea.  In fact, it wasn't an original idea when I made something similar for my niece about 5 years ago.  But I love it just the same.  It is also simple, and I thought I'd share my process with you, just in case you're inspired to do something similar.

Materials:
Butterfly print fabric
Iron on interfacing
Thick card for the background

Process:
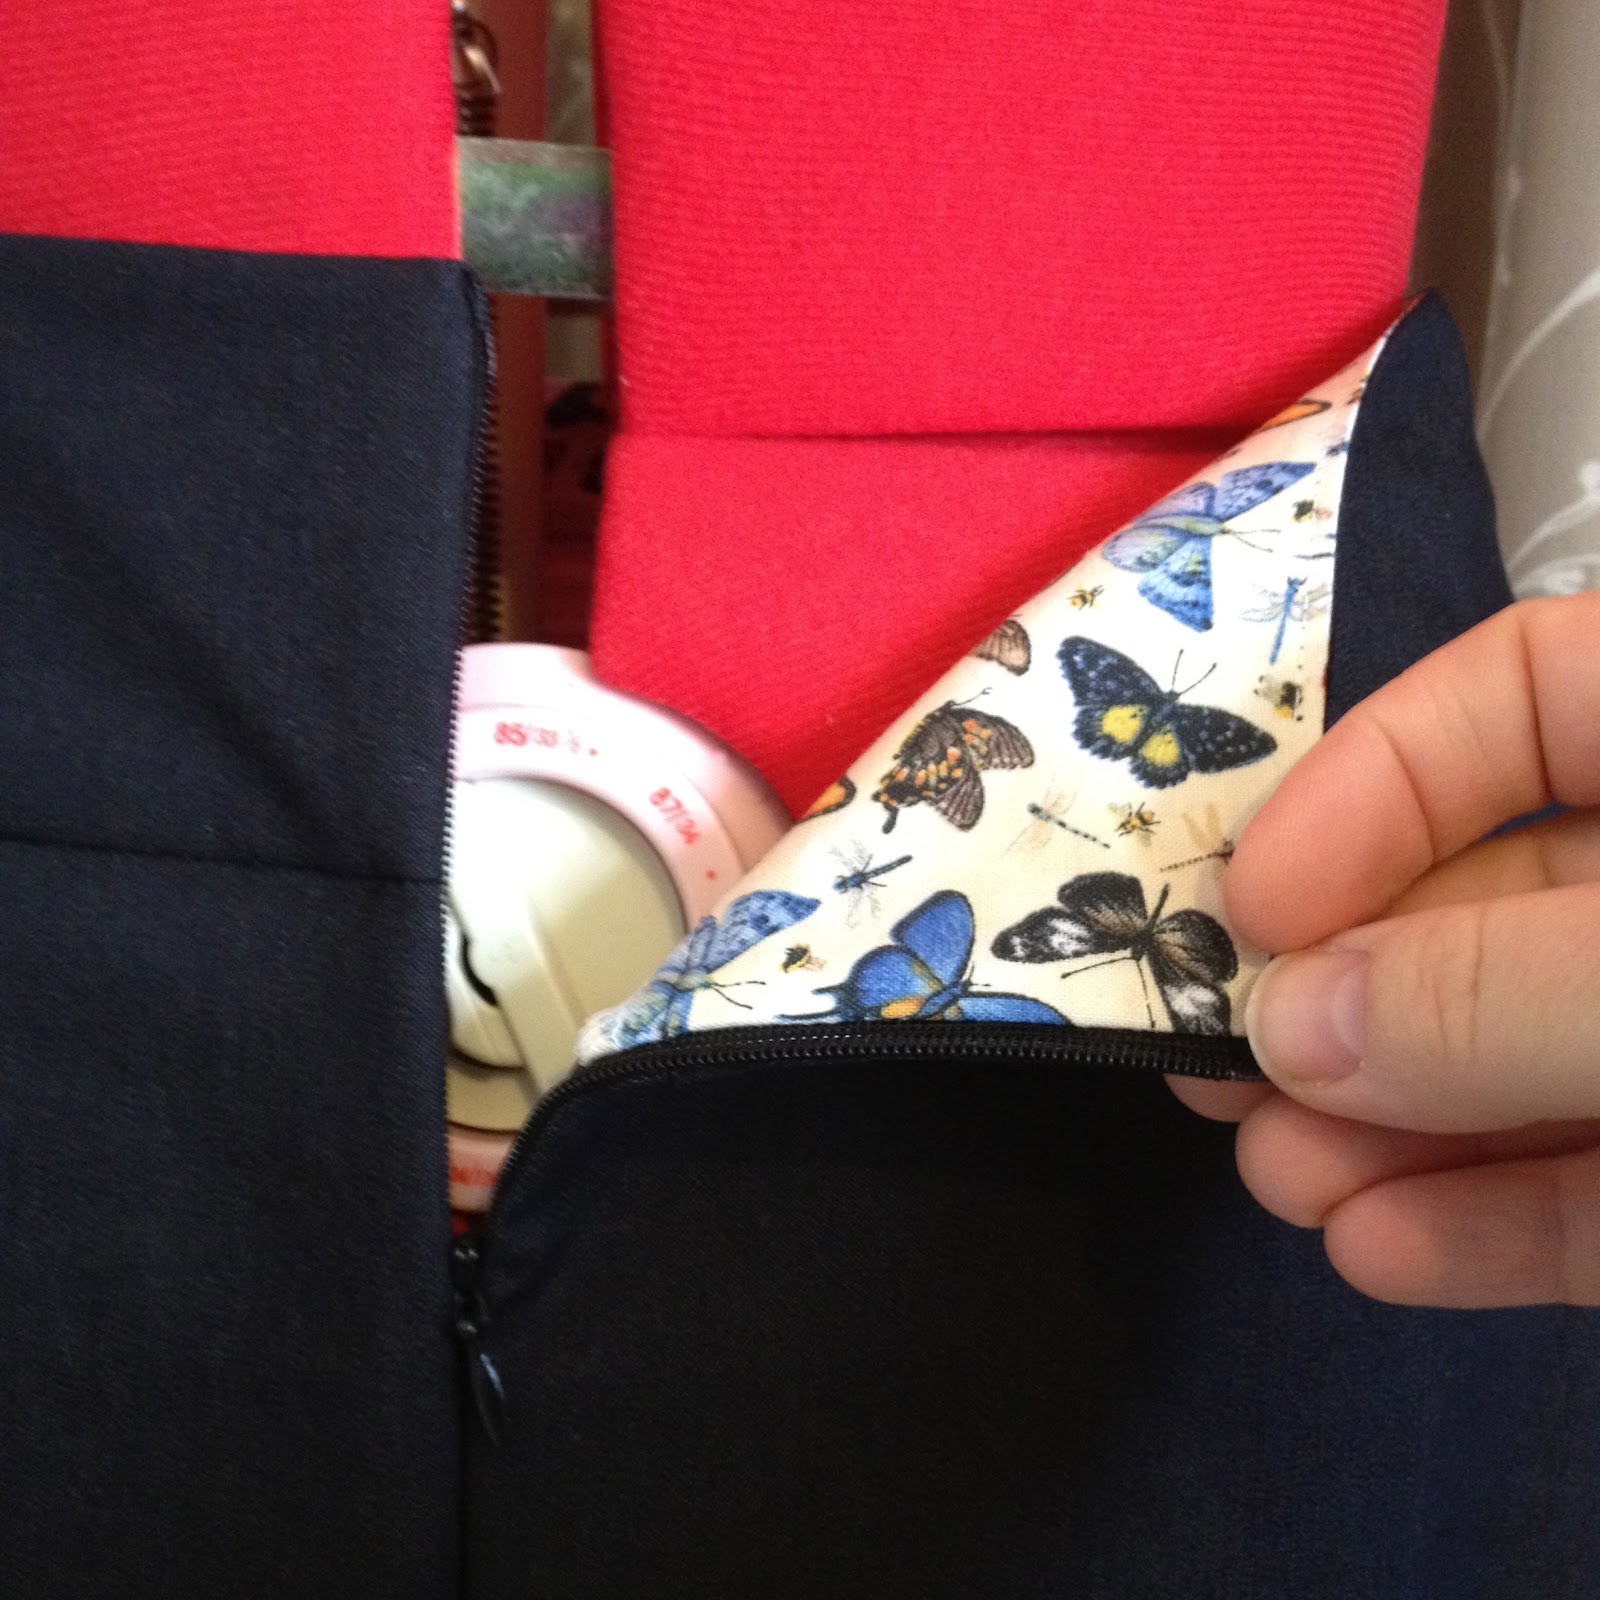
I started out with some offcuts of the  'Illuminating Spring' (by Stephanie Marrot for Wilmington Prints)  butterfly fabric I used in this skirt (I have more left over, so they'll make another appearance at some point).  I then ironed some non-woven iron-on interfacing on the back.  I'd suggest using the stiffest that you have.  As my fabric was an odd size, I used a sheet of baking paper over it to stop the excess interfacing sticking to the iron or the ironing board.


I then cut out full butterflies (there were some on the fabric with their wings folded, and I didn't use these), and by sheer luck my offcuts yielded 37 butterflies.  I needed 36 for my project.  I used nail scissors for the cutting, as they allowed the precision I needed.  I wasn't too fussed if there was a small amount of background fabric left around each, and I also elected to cut off the antennae.


I then placed the butterflies in an arrangement that I was happy with, with the aim being to distribute the coloured ones throughout the frames.  The hard bit then was to work out what the spacing should be and how to line them up on the background.


Somewhere around about here I cut my thick card into squares the right size to fit inside my frames.  You need something with enough strength to take the weight of your butterflies without sagging over time.

I decided that I wanted to top of the wings to line up, rather than the bodies, and found that my quilting ruler was the best help for this.  Just be careful to learn from my mistake, and account for the width of any matt when placing the butterflies - I had to remove these three and start again, as I was too close to the top of my backing board!  Also, I found it easier to work upside down and to start with the bottom row, that way my ruler wasn't sitting on butterflies I'd already glued in place.


Now, fold your first butterfly in half, right sides together, so that your fold is along the body.  Then apply hot glue to the wrong side of the body (ie. the outside of the fold).  Press on to your background cardboard in the desired location, trying to keep the butterfly as folded as possible, but also making sure that the glue isn't attaching the two wings to each other.  You'll need to work pretty fast, as the glue cools and sets quite quickly.


Repeat for the rest of your butterflies.


When the glue has cooled and set you can squeeze the wings together a bit more if you like.  You can also pull off any glue threads that may be floating around.


Now you can frame them.  I used frames with double mounts, and the butterflies sat up from the backing cardboard enough to make a shadow, but the glass did flatten them more than I expected.  You could use a box frame if you wanted a more pronounced fold in the butterflies.

PS.  See that red butterfly in the middle?  It was really annoying me, as I attached it too low and the one below it too high.  I used a scalpel and carefully cut them off the background, then re-glued them in place.  Whilst you need to work quickly with the glue, mistakes can be rectified!

PPS.  My butterfly fabric has a cream background, but the fabric that I used for my niece had a black background, and the butterflies looked quite different from the fabric itself once they were cut out and mounted on off-white card.  Look at the colour of the butterflies, rather than the colour of the fabric when you're choosing a fabric for this project.

PPS.  There are more butterfly art & craft ideas in my 'artwork I could try myself' Pinterest board...

Oh, and the Girl is more than happy to have something to look at on her walls at last:


Wednesday, September 12, 2012

A-line #2 (Playing Fabric Chicken)

I'm not sure if its evident in what I make or not, but I usually wear solid colours.  I'm not really into patterns or text on clothing.  Not sure why.  It surprised me then, that last year I was attracted enough to some large floral fabric to order it from the States with no particular end-product in mind.  I wear a lot of red and black, and also white, and with the days getting warmer over the last few weeks, I decided to break out and turn it into another A-line skirt.  There was only a yard (90cm) of the fabric, and the pattern calls for 2m, so figuring out how to cut it out and the length of the finished product took at least as long as the actual construction process.  Here's my finished product:


The pockets are both for practicality, and also allowed me to overlap the pieces more on the fabric, meaning that I could keep this length without adding a contrast bottom at the hem.  They're from the Aztec skirt in the Autumn/Winter 2012 Ottobre Design magazine.

To save fabric I also needed to ignore the direction of the print!  The back it cut upside down, and as you can see I haven't made any attempt to match the pattern.  I also cut separate 5.5cm wide hem facings for the bottom (cut at 90 degrees to the rest of the skirt) to maximise the length of the finished product.


Here's the complete details:

Pattern:  Nicole Mallalieu's A-line skirt
Size:      12 

Modifications:  
  • I shortened the pattern by 23cm, and cut separate hem facings.  This allowed me to make a skirt that is around 20cm shorter than the pattern from my miniscule amount of fabric. 
  • As with the Butterfly Skirt, I trimmed the yoke by 1" at the waist.
  • I cut the waistband from a contrast fabric (again, saving my floral fabric).  I'm not sure if I like the look of it or not, but the reality is that most of the time my top will hide it, as you can see in this dodgy self-taken shot.
  • I added pockets, using white for the underpocket piece, so that the red wouldn't show through the floral fabric:
I used a 5mm seam, and then under-sewed the allowance to the white fabric.

I then attached the red pocket piece to this (pinning across the top and the pocket opening and then sewing all round the outside of the pocket):

From there I treated the whole as if it were a single bit of material, and made up the skirt as usual.

Materials:  
90cm of 'Artful Home' quilting cotton by Heather Mulder Peterson; and
'Jester' red cotton from the stash, but originally from Spotlight (I think I should have bought a bolt of this, I love the colour so much)

Lessons/Comments:  
  • I didn't use the blind hemming foot to stitch in the ditch this time, and wished that I had.  I also hand-hemmed it, and found that I would have been just as happy with the finished product if I had machine hemmed it like last time.
  • Making this skirt reminded me of this post over at Made by Rae.  She lists the length of material she buys if she doesn't have a project in mind.  Also, LiEr gives a good rule of thumb over here.

Monday, August 27, 2012

Love the A-line

Have you checked out Nicole Mallalieu's A-line skirt pattern yet?  I've had a hankering for a new skirt, 'just' the fabric in my stash, and amazingly no A-line skirt pattern in my collection.  I bought Nicole's pattern, and am so glad I did.  I made this skirt yesterday while the Cyclist and the boys were in Bendigo for the day, and was waxing lyrical about it by the time they got home.

The pattern comes together really well, fits fantastically (she includes an instruction of how to modify the pattern if your waist is a size larger than your hips), and definitely doesn't look home made.  Its also very adaptable.  I've cut out a second version which I'll show off as soon as I've got it finished to show you what I mean.

Here's the details of my 'butterfly skirt':

Pattern:  Nicole Mallalieu's A-line skirt
Size:      12 

Modifications:  

  • Trimmed the yoke by 1" at the waist to make this measurement equivalent to a size 16. 
  • Added a panel of butterfly print fabric (underlined with a white poly-cotton) to the right side of the front.  Nicole suggests that for denim you can applique the panel over the top of the base fabric.  I found that the combined weight of the print and the poly-cotton was similar to the denim, so I pieced the front instead.
  • Added a side pocket on the right side.

Butterflies in my pocket!
Materials:  
Black stretch denim and a remnant of  'Illuminating Spring' (by Stephanie Marrot for Wilmington Prints) from the stash

Lessons/Comments:  

  • Nicole's directions really are fantastic.  They gave me the nudge I need to try blind hemming for the first time.  I also used the same foot to help me edge stitch and stitch in the ditch more accurately.
  • My feature panel's 1/4 of the width of the front piece, which's probably a little on the small side.  
  • This was my second attempt at putting in an invisible zipper, and the first time with my new invisible zip foot.  Her instructions are really good, and I was thrilled with the results yesterday.  Looking at the photos, my job's not perfect, but I suspect that no one else will notice.

  • I love this skirt so much that today I was tempted to tuck my top in to show it off, something that hasn't happened for a long time (probably since the waist grew to be two sizes larger than the hips!)
More butterflies on the inside


Thursday, August 9, 2012

Necessity is the mother of invention


That's it.  That's my secret to staying creative.  This picture symbolises this truth for me, because you're actually looking at my peg bag.  When I moved into my first house 16 years ago I had no spare cash at all.  I bought pegs, but didn't have a peg bag.  I did have this old doctor's style handbag that I wasn't using.  It turned out to be an excellent peg bag - I hang it across my body, with the bag at the front, and it sits open with the pegs within perfect reach.  My mother in law felt sorry for me once, and bought me a new peg bag.  It was very attractive, but made its way to the op shop without so much as being used (sorry A!), as I'm totally sold on what I already have.

For me, sometimes necessity is a financial imperative like this.  Other times its not wanting to see something go to waste (such as the bookcases I inverted here, or any of my fantastic finds), the endless optimism of my children ("of COURSE you can make a Flash / dragon / Trash Gordon costume mum"), or a self-imposed challenge (eg. Pillowcases 6 ways).

If necessity fosters my creativity, for me its hampered by disorganisation.  I'm all for taking time to ponder things, but taking time out of the creative process to search for things is just frustrating.  I'm getting better at this, and my craft cupboard is now neatly boxed and labelled (the boxes and labels are 75% actual and 25% aspirational at this point in time).  That didn't stop me from spending over an hour last Friday morning looking for the curtain wire I needed to attach the fabric to the desk screen I was finally finishing 8+ months on from moving office, but it has helped.  If nothing else it has introduced a new necessity - the need to use up my stash and stop buying fabric, so that everything will actually fit in the boxes!

I have a love-hate relationship with Pinterest too - great for organising ideas, and stopping myself from endlessly trying to find 'that' picture I saw on 'that' blog 'somewhere', but also a time waster in itself.

I'm off to do 1/2 hour of actual crafting (the Cyclist is on the school run as its a blue moon), but later I'll be back to see what everyone else places as their top tips.  See you soon!

Wednesday, August 8, 2012

In praise of peach boxes


Last week Kirsty put out the call to people on the My Creative Space page to blog about their top tip for staying creative.  I've been thinking about it, and I think that I've come up with my answer (more of that tomorrow), but in doing so I was reminded about the importance of time management in the whole creative endeavour.  I've spent way too much time over the years looking for things that I know that I have, and earlier on this year I adapted a storage idea I've been using for the kids toys for years: peach box drawers.

I love peach boxes.  I wait for peach season because of the boxes more than the fruit.  I've been meaning to dedicate a post to them for some time:

They're strong.
They're a uniform size.
They're stackable.
They have holes you can use as finger pulls.
(If you paint them) they look great.
Things look instantly neater when they're put in them.
They last better than plastic.
When you're done with them you can recycle them.
They're free.

Brilliant!

Here's how I use most of our collection at the moment:


(The one draw-back that I found was that I can't quite get two across into my craft cupboard, hence the mess to the right, but more of that tomorrow too.)

I first brought peach boxes home from the supermarket about 5 years ago, and am pleased to report that they're still going strong despite continuous use.  I have (and still do) use them for the kids toys.  Originally I took photos of the toys which they were supposed to contain, covered them with contact, and tied them on between the holes in the boxes.  In theory that meant that the kids could put their toys away properly.  In practice it made it easier for me at least!  I'm a bit gentler on my boxes, and for my labels I folded plastic A5 sheet protectors and attached them to the boxes with double-sided tape.  I made sure the slot in the top was accessible, that way I can change the labels when I like.


What's your top creative tip?  I'm planning to join up tomorrow and have my say.  I'll be looking forward to seeing what others come up with too.

Tuesday, July 31, 2012

A hybrid top

As I mentioned in my last post, I loved the way the Topkids 63/3 top came together, but felt that sleeves were in order.

I'd love to learn to draft patterns, but the idea of drafting a sleeve pattern is just way too daunting (or perhaps, just a little time consuming) for me at this point in time.  I pulled out the trusty Simplicity 4243, and found to my surprise that in fact the two tops have a very similar cut.  I overlaid the two pattern pieces to redraft the sleeve shape of my Topkids pattern, and was then able to use the Simplicity View E sleeve.  I also shortened the pattern by 14cm whilst I was at it.  All in all it was a pretty simple process once I remembered that the Simplicity pattern uses a mixture of seam allowances.  Not at all like my previous experience of trying to merge two patterns together for myself!


I'm really happy with the result, and am already planning another from my stash.  I think I'll round the back neckline this time too (I might just use the back pattern piece from the Simplicity pattern).


Saturday, July 28, 2012

Pillowcase Dress #3: Topkids 63, Design 3

Here's the first of my 'Pillowcases 6 Ways' dresses for the upcoming spring and summer:


I finished it today, on what has to be one of Melbourne's most wintery days in what feels like the coldest and wettest winter for a long time, so there won't be any modelled shots for some time!

The pattern is from a Topkids magazine.  I discovered these magazines at my local library a few years ago, and subsequently bought some used ones on e-bay.  They've been out of print for some time (from what I can ascertain most of mine date from the late 1990s), and whilst some of the designs are a bit dated, plenty of them have appeal.

I found in using the first dress that the blue pattern on the pillowcases fades as it is washed (great if you've embroidered over it, but not so good if you're relying on it for decoration), so this time I used part of the patterned section of the pillowcase and selectively embroidered it using a simple backstitch.  I'm banking on the blue you can see fading within 2-3 washes.


The ric-rac is unforgivingly narrow, and comes from the stash I inherited from my Grandmother.  There's loads more of it, so hopefully I'll become more skilled in sewing it on accurately with practice.  The buttons were from the op shop, giving the dress a total purchase price of 30 cents!


The pattern came together quite well, however I have noticed that I already have several sleeveless tops/dresses for A for this spring/summer, so I'm thinking of making another version with sleeves.  I think I'll also make it tunic length, to make it easier for her to crawl in when the time comes.

The background and my 'rules' for the Pillowcases 6 Ways challenge can be found here, and my previous creations are here and here.

Friday, July 27, 2012

Gran's Creative Space

This week's Creative Space is brought to you by my mum.  I promise I have been creating myself though, and will return next time around with some of my own work.


We had a special 'dedication' service for A at church last Sunday.  Its a bit like a christening, but without the water - the Cyclist, the boys and I got up the front and publicly thanked God for our Newbie, and promised to raise her as best we can with the help of the assembled family and friends.  In celebration Mum gave her a blanket to represent the love of her extended family.  Mum would probably say she's not into patchwork, but she has an embroidery machine and can crochet (check out the combined work in both!), and the result certainly looks like a twist on patchwork to me.


Each square is of polar fleece, with a backing of flannel for added warmth and to hide the back of the embroidery.  They're overlocked around the edges, then joined together with several rows of crocheted cotton.  There are nine different bears, plus one square with A's name and birth date.

The blanket's spent the week in the car and the pram, getting maximum exposure on the school run and generally being loved (snuggled into, played peek-a-boo with and drooled on) by its young owner.

Thanks Mum!

Thursday, July 5, 2012

The "Big Boy's" Creative Space

My eldest has declared he wants to be known as the 'Big Boy', even though he knows that within a couple of years his younger brother (by three years) will be taller than him.  Being school holidays, today's Creative Space is all about the Big Boy.  Here's what he came up with yesterday:

Pikachu from Lego

 3D hand picture inspired by this Pin.

He's thrilled with both, and now wants to do more drawings of his hand and of other shapes (a hot air balloon is next I understand).

There's also been a whole lot of CS Lewis (he's made a Lego Dawn Treader and associated paraphernalia), interspersed with Nintendo, going on here.  How are your holidays panning out?  Does a break from school mean more or less creative time for you?

LinkWithin

Related Posts Plugin for WordPress, Blogger...